Tuesday, October 29, 2013

Can you really grow all your own food for a year in 700 square feet?


A time-honored response to economic distress and uncertain times is to start or expand a vegetable garden. After all, we have to eat, and food purchases account for a considerable percentage of our expenditures, even with subsidies to large agribusiness concerns that drive down that percentage. Sharon Astyk and Aaron Newton, in their book A Nation of Farmers, document how the victory gardens of World War II supplied a surprisingly large amount of the fruits and vegetables eaten during that time.1 Small city gardens and backyard livestock still supply good-sized percentages of vegetables and meat in large cities such as Hong Kong.2 Following the economic crisis of 2008, Fedco Seeds, a small seed company in Maine, experienced rapidly growing sales.3

Just because more people may be gardening or may have enlarged their gardens, however, does not mean that they are gardening in the most beneficial way, for themselves and for the ecosystem of which their backyard is a part. While there is a considerable body of information in book and online form about backyard gardening, including information available from the U.S. Department of Agriculture in the form of state Extension publications for home gardeners that help gardeners respond to issues specific to their region4, little of it is devoted to how to raise foods that offer the highest value in calories and nutrition for the space used. Since growing staple foods has become almost entirely the responsibility of agribusiness, backyard gardeners have concentrated on crops such as lettuce, tomatoes, peppers, cooking greens, snap beans and peas, sweet corn, and culinary herbs. Most haven’t concerned themselves with growing calorie-dense crops, primarily root and dry seed crops, because these are widely available at low cost from agribusiness and its distributors and retailers. Gardeners prefer to grow the more perishable crops that do well in small spaces, often taste better grown and consumed fresh than do the multiple-day-old versions available through the agribusiness chain, and cost more to purchase from a local farmer than to grow themselves. While this is a reasonable way to garden for people with limited time to devote to gardening and sufficient income to purchase most of their food supply, it will not scale up well to providing a sizable fraction of the calories and nutrition a person requires in a year. For that a different range of crops must be grown and gardening techniques adapted to produce them at the times and in the amounts needed.

Ecology Action, a not-for-profit organization based in Willits, California, has since its inception focused on how to raise substantial amounts of nutritious, calorie-dense food in backyard-sized plots. Its 1985 publication One Circle: How to Grow a Complete Diet in Less than 1000 Square Feet by David Duhon describes the theory behind developing a vegan diet that can provide all of the calories and nutrients needed by an adult in a year. Duhon considered a suite of crops that when grown according to the methods developed by Ecology Action and described in its publication How to Grow More Vegetables by John Jeavons (hereafter designated as HTGMV), could provide that vegan diet for both men and women while requiring a garden size of no more than 1400 square feet per person.5 (While Duhon also proposes garden plans for complete vegan diets that might be grown in as little as 550 square feet [the woman’s plan] and 800 square feet [the man’s plan], the average of which accounts for the 700 square feet of numerous later references to his work including the title of this report, both diets are very limited and the garden plans do not include the same crops. The 1400 square foot garden plans use the same suite of crops for both men and women, the suite of crops included is wider, and the crops used for the 1400 square foot garden plans are also used in the smaller garden plans. Any issues with yield, for instance, that affect the 1400 square foot garden plans will also affect the smaller garden plans. Thus I have chosen to evaluate the 1400 square foot garden plans in this report rather than the smaller garden plans.) The two suites of crops, one for northern areas and one for southern areas, are shown in Tables 1 and 2.

Table 1. 1400 square foot complete-diet garden, northern version
Crop
Number of crops grown per year
Assumed yield lb/100 sq ft
Crop area for women, sq ft
Crop area for men, sq ft
Wheat
2
10
500
675
Garlic
1
120
25
34
Sunflower seeds
2
5
50
68
Potatoes
2
200
225
304
Onions
2
400
25
34
Parsley
2
35
50
68
Turnips
2
200 greens, 70 roots
25
34
Collards
1
300
25
34
Parsnips
2
238
25
34
Filberts
1
12.4
240
324

Table 2. 1400 square foot complete-diet garden, southern version
Crop
Number of crops grown per year
Assumed yield lb/100 sq ft
Crop area for women, sq ft
Crop area for men, sq ft
Sweet potatoes
1
82
325
439
Soybeans
1
8 (dry)
75
101
Potatoes
2
200
250
338
Sunflower seeds
2
5
50
68
Peanuts
1
10
250
338
Turnips
2
200 greens, 70 roots
25
34
Onions
2
400
15
20
Wheat
2
10
100
135
Parsley
2
35
15
20
Garlic
1
120
38
51
Leeks
1
240
25
34


Because the average residential home sits on slightly less than ¼ acre (approximately 10,000 square feet) of land6, Duhon’s minimum-area garden plans could put the growing of a full diet within range of a good-sized fraction of U.S. residents. However, a careful reading of One Circle reveals that Duhon does not claim to have planted and eaten for a year from such a garden, thus it does not document that the assumed yields upon which the garden plans depend have been obtained by Duhon or by anyone else at Ecology Action.7 The value of the book rests with the nutritional analysis that Duhon has done and the way in which he has used nutritional needs and the postulated yields obtainable by Ecology Action’s methods to develop some versions of very small gardens that can meet those needs. He has also addressed how one might transition to a diet based on only those foods while one is developing skills with the methodology that Ecology Action espouses. However, I am aware of no reports from gardeners who have attempted to grow the complete-diet gardens in Tables 1 and 2 to determine if in fact the crop yields required for them can be obtained under their conditions.8

Later work by Ecology Action suggests that a larger area, anywhere from 2,500 to 4,000 square feet or more, will be required for a garden that produces all of its own compost material for maintaining fertility as well as sufficient calories and nutrition for one person’s survival. In such a garden about 60% of the area would be used to grow grain and seed crops for calories and compost material, about 30% of the area would be planted in high-calorie root crops such as potatoes and sweet potatoes, and the remaining area would be planted to vegetable crops for vitamins and minerals.9 Ecology Action’s 2003 publication Designing a Grow Biointensive Sustainable Mini-Farm offers a template for design of a backyard garden to meet dietary needs and sustainability concerns.10 However, without knowledge of the yield obtainable per unit area of each crop in one’s own conditions, it will be impossible to determine if in fact one can grow most to all of one’s own diet on a backyard scale, whether at the smaller size of Duhon’s designs or at the larger scale that Ecology Action now promotes as necessary for sustainability.

In this report I will discuss my efforts as a scientist-gardener to determine the yields I can obtain for the suites of crops suggested by Duhon as a contribution toward developing a prototype minimum-area sustainable garden plan applicable to the region in which I live. By doing so I hope to encourage other scientists who also garden, as well as new and experienced backyard gardeners, to work together to develop and publicize similar plans for the regions in which they live. In the ongoing descent, Astyk and Newton argue, we’ll need 100 million people in the U.S. to take at least some role in raising their own food, to help cushion the blow from erratic employment, rising food prices, and weird weather patterns and other environmental responses to damage caused by human activities.11 If by our example we can show the usefulness of the scientific method to helping people grow most or all of their own food on backyard-scale plots, we may get the scientific method into more hands and in a hands-on way. This could contribute to getting the scientific method through the Long Descent12 as well as provide some measure of food security for anyone who takes up gardening in this way.

Method

The garden is located in Spanish Lake, Missouri, an unincorporated area in northeastern St. Louis County near the confluence of the Missouri and Mississippi Rivers. The geological history of the area includes periods of time when winds deposited glacial loess over the existing land surface.13 As a result the garden soil consists of a very deep, moderately well-drained, moderately permeable loess-derived silt loam and silty clay loam.14

Each garden bed is 4 feet wide by 25 feet long for a total bed area of 100 square feet; fifteen such beds are currently in production. The garden area slopes slightly to the east and south and is in nearly full sun during most of the growing season, which lasts from approximately mid-March till mid-November; the frost-free portion of the season is from sometime in April through sometime in October. In 2013 the last spring frost occurred on April 20 and the first fall frost occurred on October 25. When needed, supplementary water is applied from the municipal water supply, or if a small enough amount is needed (for instance, for a small area of newly-planted seeds or seedlings), from previous rainfall stored in rain barrels.

To prepare each garden bed for planting I apply compost made from kitchen wastes, garden wastes, and autumn leaves that have been piled in unmeasured proportions and allowed to remain piled without turning for a few to several months until use. While the amount of compost I apply to each garden bed has varied over the years according to changes in the recommendations in successive editions of HGTMV, it has ranged from 15 to 20 gallons of compost per 100 square feet. The amount and kind of organic fertilizer applied to each bed has varied from bed to bed and from year to year. After applying compost and any fertilizer, I dig in these materials to a depth of approximately 12 inches with a shovel or a broadfork15, rake the bed smooth, and then plant seeds, seedlings, or roots according to that year’s garden plan for that bed. Seeds, potato starts, and sweet potato slips are procured from a variety of small seed companies. Seedlings are grown on site. Garlic and potato onions are replanted from the previous year’s harvest.

Varieties, crop spacings, and planting dates for each crop from Tables 1 and 2 are given in Table 3 for the 2013 growing season and for the growing season in which I obtained the highest yield if different from 2013. The HTGMV spacing column reports the spacing in inches that is recommended for that crop in the 8th edition of HTGMV. In the actual spacing column HTGMV means planted on the triangular spacing recommended by HTGMV with spacing between plants given in inches. In the date planted column TP means transplanted for those crops transplanted as seedlings.

Table 3. Planting data for each variety of the crops given in Tables 1 and 2.
Crop
Variety
HTGMV spacing, inches
Actual spacing, inches
Date planted
2013 spacing, inches
2013 planting dates
Garlic
Inchelium Red
4
4, HTGMV
11/16/1999
6, HTGMV
11/10/12
Potatoes
Rose Gold
9
9, HTGMV
4/7/2006


Elba


In-row 12, between-row 24
5/1

German Butterball


In-row 12, between-row 24
4/30
Onions
Potato (multiplier)
Not given
6, HTGMV
11/26/2005
8, HTGMV
11/10/12

Rossa di Milano
4


In-row 6, between-row 12
4/24
Parsley
Gigante d’Italia
5
*
Sown 2/4/2008, TP 4/23/2008


Turnips
Purple Top White Globe
4
In-row variable, between-row 6
8/16/2008
In-row variable, between-row 12
8/16
Collards
Even’Star Champion
12
12, HTGMV
Sown 2/1/2009, TP 5/17/2009
In-row variable, between-row 12
8/7
Sweet potato
Ivis White Cream
9
In-row 15, between-row 24
6/21/2008


O’Henry


In-row 12, between-row 48
5/29
Soybean
Asmara
6
**
7/2/2011
**
6/16
Leeks
Giant Musselburg
6
6, HTGMV
Sown 2/1/2006, TP 4/14/2006


Bleu de Solaize


In-row 6, between-row 12
Sown 1/22, TP 4/24
Peanut
Tennessee Red Valencia
9


In-row 12, between-row 24
6/3
Wheat
Hard Red Winter
5


Broadcast
11/16/2012
*Parsley: 4 plants per square foot
**Soybean: 4 seeds per square foot


For some crops I plant a certain number of seeds or seedlings in a square foot instead of using the triangular spacing recommended by HTGMV. Some crops are planted in rows across the short dimension of the bed (turnips, leeks, bulb onions) or the long dimension (peanuts, potatoes, sweet potatoes). For those crops both the in-row and between-row spacings are given in inches. For some crops the in-row spacing is variable and is so noted.

Planting information, including the number of square feet planted and the weights harvested on each harvest date as measured with a 0-5 pound or 0-25 pound scale, are recorded separately for each variety of each crop. At the end of the growing season the total harvested weight is obtained by summing the weights measured on each harvest date. For each different variety of each crop the total harvested weight and the area planted are used to compute the weight harvested per square foot of garden space planted to that variety. The weight per square foot is multiplied by 100 to obtain the weight per 100 square feet for comparison with Duhon’s assumed yield for that crop.

Results

In Tables 4 and 5 the yield assumed by Duhon for each crop in the 1400 square foot complete-diet gardens is contrasted with the best yield I have obtained for that crop from 2000 through 2013. I have also reported the 2013 yield for those crops for which the growing season is complete as of this writing.

Table 4. Yields obtained for northern version crops
Crop
Assumed yield lb/100 sq ft
My best yield lb/100 sq ft
2013 yield
lb/100 sq ft
Wheat
10
*
Not yet processed
Garlic
120
39
12
Sunflower seeds
5
**
Not grown
Potatoes
200
111
75, Elba


38, German Butterball
Onions
400
78
33, potato


34, Rossa di Milano
Parsley
35
84
Not measured
Turnips
200 greens, 70 roots
101 roots
Still growing
Collards
300
66
Still growing
Parsnips
238
Not grown
Crop failure
Filberts
12.4
**
**
* grown in some years but no yield data was recorded
** unable to obtain yield
   
Table 5. Yields obtained for southern version crops
Crop
Assumed yield lbs/100 sq ft
My best yield lb/100 sq ft
2013 yield lb/100 sq ft
Sweet potatoes
82
74
64
Soybeans
8 (dry)
41 (green)
Crop failure
Potatoes
200
111
75, Elba


38, German Butterball
Sunflower seeds
5
*
Not grown
Peanuts
10 (dry)
Not grown
9.6 (wet)
Turnips
200 greens, 70 roots
101 roots
Still growing
Onions
400
78
33, potato


34, Rossa di Milano
Wheat
10
**
Not yet processed
Parsley
35
84
Not measured
Garlic
120
39
12
Leeks
240
107
Still growing
* unable to obtain yield
** grown in some years but no yield data was recorded

Discussion

It is evident from Tables 4 and 5 that except for parsley, turnip roots, sweet potatoes, and perhaps soybeans and peanuts depending on the green/dry weight ratio, I have been unable to obtain yields as much as half that required for Duhon’s 1400 square foot complete-diet gardens. For some crops I have been unable to obtain a yield at all. Only for parsley and turnip roots have I obtained better yields than those assumed by Duhon in developing his minimum-area garden plans.

Possible explanations for being unable to obtain the yields assumed possible by Duhon include gardener error in applying HTGMV’s particular method; other poor gardening practices; poor choice of crop varieties; soil deficiencies; losses to animals; and climatic factors and other possible problems with the yield assumptions Duhon made to develop the garden plans. Each of these will be examined in turn.

Errors in applying HTGMV’s method. The hypothesis of gardener error in applying HTGMV’s method gains merit when examining Table 3, which reveals that in many cases I have been planting at wider spacings than those suggested by HTGMV and than I have used in the year during which I obtained maximum yield. A wider plant spacing generally translates into reduced yield since yield is measured in weight per unit area and a wider spacing means fewer plants per unit area. However, previous experience in using the crop spacings suggested in HTGMV for those crops have shown that the wider plant spacings make up for reduced yield by improving other aspects of planting and caring for the crop. I have discussed elsewhere how I have changed my gardening methods as my garden size has increased.16 HTGMV was originally designed for very small gardens in the tens to a few hundreds of square feet, where it is easier to work at small plant spacings. Weeding between onions planted at a 4 inch spacing, for instance, means pulling individual weeds while kneeling in a 12-inch-wide path as hoes small enough to fit between the plants do not exist. The difficulty in doing this, and the time required to do it, led me to work at the wider spacings shown in Table 3 for many crops. To the extent that other people also experience these difficulties it suggests that a minimum-area garden, even if it uses the same suite of crops as Duhon proposes, will require more area than Duhon’s plans provide to grow the required weight of each crop.

Other possible sources of error in applying the HTGMV method include not properly fertilizing the garden beds before putting them into production; not producing the quality of compost needed to maintain intensive production; and not planting in synergistic combinations so plants can enhance each other’s growth. The error of not properly fertilizing at the outset will be addressed more fully later on. Compost quality depends in part on proper initial fertilization and also, according to HTGMV, on using their technique for creating properly cured compost.17 I find the method too complex to apply as I often do not have the required ratios of green and dry plant wastes on hand as the piles are being built. Thus my compost is likely to be of lower quality than the HTGMV method claims is required for achieving yields in the medium range (the assumed yields in Duhon’s plans). “Synergistic plant combinations” includes aspects such as crop rotation and companion planting that affect interactions between plants.18 Although I have developed a workable crop rotation plan, I have neglected other aspects of companion planting. However, Duhon’s garden plans will not be able to draw on much of the companion planting lore and may not allow for optimum crop rotation, suggesting that they may also be subject to lower yields than Duhon assumed.

Other poor gardening practices. These include not planting at the proper time for this location and not keeping the planted crop properly weeded. An examination of the planting dates in Table 3 in comparison to Missouri Extension’s suggested planting dates for this area19 indicates that I am likely planting too late for the highest yields in bulb onions, leeks, and potatoes. I am aware of this but have had difficulty planting early crops like these at the proper time. The potato starts do not arrive before April 10 from their source in Maine. Spring rains are often heavy, and cool soil and air temperatures mean that the soil may be too wet to work when the preferred planting window arrives. These factors may reduce the obtainable yield for this area to below Duhon’s assumptions for his minimum-area gardens, thus requiring an increase in the size of the garden to obtain the crop weight needed for the diet.

Weeding has been a continual challenge, one that I acknowledge I have not met well. Besides often not weeding in a timely manner, I compound the error by composting weeds that have gone to seed, ensuring that more weeds will germinate in future years. The size of the garden is a major factor. When I had only a hundred or so square feet of vegetable garden space it was easy to keep even closely spaced plantings weeded. A large (by most people’s expectations) backyard garden, a crowded planting schedule, a life beyond the garden, and a tendency to put off weeding when there is a conflict between it and other aspects of the garden and of life have conspired to lead to excessive weediness and probable loss of yield in my garden. As with planting dates, my difficulties may be shared by others attempting to grow the crops for a minimum-area garden in this region and should be reckoned with in the garden design.

One way to determine if poor general gardening practices are a factor in the low yields I obtain is to compare them with yields obtained by other gardeners or by farmers in this area. However, the Missouri Extension’s expected yield information is based on row feet of garden space. It is not clear how to translate row feet of yield into yield per unit area since only the length of the row and not its width is given.20 I have been unable to find a source that lists expected yields in weight per unit area for vegetable crops grown in the lower Midwest.

Poor choice of crop varieties. The possible yields given in HTGMV for each crop do not indicate that variety chosen may affect yield. Farmers and gardeners observe that some varieties of each crop yield better than others under their conditions. The effect of variety can be dramatic, as shown in Tables 4 and 5 for two different potato varieties planted in 2013 on the same spacing and in beds prepared and fertilized in the same manner. It may be that if I chose the best-yielding variety for each crop, I could achieve the mid-range yield that Duhon assumes for his garden plans. To date I have not been able to locate quantitative information on the highest-yielding varieties for Midwestern gardens. Seed company claims that particular varieties are “productive” do not include the kind of quantitative information that I have provided in Tables 4 and 5. Without this information we cannot determine if Duhon’s yield targets can be achieved with some varieties but not others.

Soil mineral deficiencies. Another factor that may reduce the yields I obtain is an unbalanced soil mineral base. Ecology Action recommends obtaining a professional soil test prior to first preparing each bed and adding organic fertilizers as needed to bring nitrogen, phosphorus, potassium, and pH to the level recommended by the testing organization for a vegetable garden. While I had a soil test done by the Missouri Extension and followed its recommendations when I prepared the first garden bed, I did not follow its recommendations when first preparing subsequent beds. Instead I used a generic organic fertilizer blend of 4 quarts of cottonseed meal, 1 quart of garden lime, 1 quart of hard rock phosphate, and 1 quart of greensand, mixed together and applied to 100 square feet, when I added fertilizer at all.21 Steve Solomon offers a more nuanced view of soil mineralization and how to bring it to optimum levels in his latest book The Intelligent Gardener.22 In April 2013 I had the garden’s soil tested by the laboratory Solomon recommends. The results indicated that the soil is excessive in potassium and magnesium and deficient in the other minerals tested for. As a result, I developed a different blend of organic fertilizers that more specifically addressed the soil’s mineralization needs, following Solomon’s suggestions.23 I hypothesized that yield, taste, and pest and disease pressure might improve in 2013 as a result.24 For the crops in Tables 4 and 5, the lower yield seen this year is at least partly due to increased spacing in 2013 versus the year in which the highest yield was obtained, as shown in Table 3. Because the spacings were different it is not possible to determine if remineralization affected yield. For taste and pest/disease pressure, little if any difference was noted in the crops in Tables 4 and 5. Thus the effect of soil remineralization is inconclusive for the crops reported in Tables 4 and 5.

Losses to animals. In some cases, as with sunflower seeds and filberts (hazelnuts), animals have eaten most or all of the crop before it was ready to harvest. Squirrels and birds have been observed to feed on these crops, and other animals may be feeding on them as well. Until I can find a way to protect aboveground seed and nut crops sufficiently to retain most of the yield, I cannot grow these crops. Since peanuts form underground and no underground pests caused excessive crop loss this year, peanuts may prove to be a more useful seed crop for my minimum-area garden than sunflower seeds or filberts.

Other factors. Duhon’s minimum-area garden plans were based on nutritional analyses and the expectation of Ecology Action that experienced gardeners should be able to obtain yields two to four times that which is typical of conventional agriculture.25 They do not appear to take climatic factors into account. While a climate with a long, cool summer is ideal for potatoes and would be reasonably expected to produce a higher yield of potatoes per unit area than a climate with only a short period of cool weather followed by a long and hot summer, Duhon’s northern and southern garden plans assume the same yield is obtainable for each. My experience is that it is difficult to achieve Ecology Action’s mid-range yields for most crops that prefer long, cool growing seasons, while it is easier to achieve those yields for crops that grow well in a long, hot growing season. This matches climatic patterns for my location in east-central Missouri. Duhon’s northern and southern plans attempt to take advantage of the length and warmth of the growing season by the choice of crops, but because the southern suite still includes crops like onions and potatoes that prefer cooler conditions and assumes that yields will match those of crops grown in the conditions they prefer, it may not be realistic in its area expectation. Table 5 shows that my yields for crops that grow well in hot-summer climates are generally closer to Duhon’s expectations than for those crops that prefer cooler summers, in support of my argument.

Duhon’s southern plan requires that 433 square feet of the garden area be planted to both a warm season and a cool season crop during the growing season. For the double-cropped area he proposes that the warm season component would include 233 square feet of sweet potatoes, 100 square feet of peanuts, and 100 square feet of sunflowers. The cool season components would include 153 square feet of fall potatoes, 25 square feet of spring turnips, 25 square feet of fall turnips, 15 square feet of spring parsley, 15 square feet of fall parsley, and 200 square feet of winter wheat.26 Because the frost-free growing season is only about six months long and both spring and fall are short in this area, there is insufficient time in the growing season to permit Duhon’s double-cropping scheme without using season extension tools such as cold frames or hoop houses. For those of us who do not practice season extension it will be necessary to increase the garden area to avoid planting the same beds or portions of beds to more than one crop during the growing season.

It is evident from the plans that a diet based on them will be monotonous. Astyk has discussed the difficulty that many people have in changing their diet even when the necessity is obvious.27 Although the idea of a minimum-area garden is valuable, I suspect that its acceptance will require a more varied diet than Duhon’s proposed plans will allow and thus a larger garden area since crops with lower calorie and nutrition yields per unit area will be included.

Finally, Duhon’s plans were developed before Ecology Action proclaimed the necessity of devoting a large proportion of the growing area, as much as 60%, to grain and other high-carbonaceous-material crops in order to grow enough carbon to make enough compost to sustain the garden’s fertility through time.27 Duhon’s southern plan plants only 34% of the area to the carbonaceous material producing crops of wheat, soybeans, peanuts, and sunflowers, thus the yields may not be sustainable year after year if the only source of fertilizer is the compost made from garden and kitchen wastes.

To address the various issues discussed above I am developing a garden plan suited to this area that includes a larger variety of crops than Duhon includes in his garden plans while working toward the sustainability goal that Ecology Action espouses and improving my gardening skills in the process. The current plan consists of a total of 15 beds (1,500 square feet), planted in five groups of three 100 square foot beds each. The groups of beds, named after their main crops, rotate throughout the garden on a five-year schedule and include the following crops in 2013.
            Grain group: flint corn
            Legume group: cowpeas, edamame-type soybeans, peanuts, dry beans, shell peas, snow peas
            Cucurbit group: potato onions, garlic, and winter wheat planted the previous winter and harvested in early summer, followed by summer squashes (Cucurbita pepo), winter squashes (C. maxima and C. moschata), muskmelons, cucumbers
            Solanum and morning glory group: potatoes, tomatoes, sweet and hot peppers, eggplants, tomatillos, ground cherries, sweet potatoes, basil
            Green and root vegetables: lettuces, cabbages, collards, kale, broccoli, bok choy, turnips, rutabagas, storage radishes, carrots, beets, parsnips, parsley, cutting celery, bulb onions

Compared to Duhon’s southern complete-diet plan, this plan offers a much higher variety of crops for the gardener to eat, at the price of growing a large area to crops of lower calorie and/or nutrient density. Thus it cannot provide all the calories and nutrition that the two adults who eat from it require, though we eat a substantial fraction of our diet from the garden from June through December and a smaller fraction during the rest of the year. Compared to Ecology Action’s sustainable garden plan, the total of 40% of the garden area planted to grains and legumes is less than the 60% of the garden area that Ecology Action suggests, though it is more than the 34% in Duhon’s southern plan. Of the crops Ecology Action currently recommends for the 30% of the area to be grown in high-calorie root crops29, the plan includes only potatoes, sweet potatoes, leeks, and garlic planted to a total of 216 square feet in 2013, for only 14% of the garden area. The remaining 46% of the area is planted to crops placed in the vegetable crop category that Ecology Action recommends should take up only 10% of the garden area. Again this comes at the price of lower caloric and nutrient density, but with the advantages of good garden rotation practice (the time between the same plant family in each bed is five years) and a higher variety of crops available throughout and, by proper storage techniques, beyond the growing season. At the time of writing the 2013 growing season continues. After it ends, I will post the results for each crop and a discussion of the overall garden performance and its effect on my planning for future years in my blog, Living Low in the Lou.30

Future work

Much work remains to be done to develop garden plans that provide significant amounts of calories and nutrients for the gardener, are adaptable to backyard-sized plots, follow good gardening practices, and produce a wide variety of foods the gardener will actually eat over the growing season and beyond. As this report has demonstrated, one of the linchpins of this effort is to obtain the yield per unit area for the various crops and varieties that are grown in specific regions. I have made some such information from my scientific gardening practice available in this report and will post more information to my blog as it becomes available.

However, I am only one gardener in one region. If there were more gardeners here in the St. Louis region interested in gardening this way, we could run variety trials to find high-yielding varieties that would let us raise more high-calorie, nutritious food on the same amount of land. We could run spacing trials to determine the optimum spacing for each different crop. We could develop garden plans for our region that marry eater desires for variety with good gardening practices and sustainability concerns. We could inform each other of our gardening failures, analyze them, and learn from them to become better gardeners individually and as a group. Gardeners in other regions could do similar things and should because something that works here won’t work everywhere else.

What I have described is the application of the scientific method to gardening. It requires little in the way of equipment and prior knowledge, only paper and writing instruments for drawing garden plans and recording planting and harvesting details, rulers and tape measures for accurate garden area layout and area measurements, standard human-powered backyard gardening tools, kitchen scales, and a knowledge of basic mathematical operations and high school level geometry. (An abacus, for summing up weights, and a slide rule, for calculating weight per unit area, would be useful additions to this toolkit for those who prefer not to depend on the continued availability of calculators and the batteries they require.31) Carol Deppe has user-friendly information on how to do garden trials in her book Breed Your Own Vegetable Varieties.32

By communicating our results – through blogs, e-lists, local gardening and neighborhood associations, casual conversations, and the like – we would help ourselves and others to make the most of our gardening efforts and thereby reduce some of the negative effects of ongoing economic and environmental changes. Since doing a good garden trial requires a working knowledge of the scientific method and communicating the results to others helps the community of gardeners evolve better ways to garden faster than would otherwise happen, we would also get the scientific method into more hands and in a hands-on way that produces many benefits for those who apply it. This could result in more food security as we go through the Long Descent while increasing the odds that the scientific method will make it through the knowledge bottleneck that accompanies civilizational decline.33


Bibliography

Astyk, Sharon, Independence Days: A Guide to Sustainable Food Storage & Preservation (New Society, 2009).
Astyk, Sharon, and Aaron Newton, A Nation of Farmers: Defeating the Food Crisis on American Soil (New Society, 2009).
Clason, Clyde B., Delights of the Slide Rule (Crowell, 1964).
Deppe, Carol, Breed Your Own Vegetable Varieties: The Gardener’s and Farmer’s Guide to Plant Breeding and Seed Saving (Chelsea Green, 2000).
Duhon, David, One Circle: How to Grow a Complete Diet in Less than 1000 Square Feet (Ecology Action, 1985).
Ecology Action, Designing a Grow Biointensive Sustainable Mini-Farm: A Working Paper, Self-Teaching Mini-Series #31 (Ecology Action, 2003).
Greer, John Michael, The Long Descent: A User’s Guide to the End of the Industrial Age (New Society, 2008).
Hawker, Jon L., Missouri Landscapes: A Tour Through Time (Missouri Department of Natural Resources, 1992).
Jeavons, John, How to Grow More Vegetables Than You Ever Thought Possible on Less Land Than You Can Imagine, 8th edition (Ten Speed Press, 2012).
Solomon, Steve, Gardening When It Counts: Growing Food in Hard Times (New Society, 2005).
Solomon, Steve, with Erica Reinheimer, The Intelligent Gardener: Growing Nutrient-Dense Food (New Society, 2013).

Notes

1. Astyk and Newton 2009, pp. 58-59.
2. Astyk and Newton 2009, p. 69.
3. Letter dated 1/18/2009 from C. R. Lawn of Fedco Seeds, http://www.fedcoseeds.com/, and included with vegetable seed orders. At that time the growth rate in sales relative to the previous year was 42.5%. While the letters from subsequent years indicate that growth slowed relative to 2009, it appears to have continued.
4. The USDA’s Cooperative Extension System Offices website is http://www.csrees.usda.gov/Extension/index.html. The different state extension offices can be located through it. Missouri’s Extension website is http://extension.missouri.edu/index.aspx
5. Duhon 1985, pp. 191-196.
6. Astyk and Newton 2009, p. 28.
7. Endnote 9 in Jeavons 2012 regarding the possible yields column in the charts states “Estimates based on our experience and research. Use lowest figure if you are a beginning gardener,; middle if a good one; highest if an excellent gardener with exceptional soil and climate. (The testing and development process requires a long time and has involved many failures. … There is still much left to be done.)” It is from the mid-range yield given in an earlier version of the master charts that Duhon derives his assumed yields for his garden plans.
8. Crop yields are dependent on a number of factors such as growing season length, day length, severity of winter and of summer, soil type, rainfall, differential performance of crop varieties, and so on that vary widely across the U.S. There is no guarantee that yields obtained in northern California will be obtained in other regions of the country.
9. Jeavons 2012, pp. 33-43.
10. Ecology Action, 2003.
11. Astyk and Newton 2009, pp. 58-62. The 100 million new farmers figure is on p. 61.
12. Greer 2008. His discussion of the vulnerability of the scientific method to the effects of the Long Descent is on pp. 182-187.
13. Hawker 1992, p. 146.
14. According to the custom soil resource report for this location obtained from the National Cooperative Soil Survey’s on-line request service.
15. I obtained the broadfork from Johnny’s Selected Seeds, www.Johnnyseeds.com.
17. Chapter 3 of Jeavons 2012 addresses the functions of compost in the method and how to produce properly cured compost to maintain garden fertility.
18. Chapter 6 of Jeavons 2012 addresses companion planting and crop rotations.
20. Download the free PDF from the website in note 18 for the row feet to plant per person per year.
21. The formula and the rationale behind it are given in Solomon 2005.
22. Solomon 2013.
25. Jeavons 2012.
26. Duhon 1985, p. 194.
27. Astyk 2009, p. 102.
28. Jeavons 2012, pp. 39-43.
29. Jeavons 2012, p. 40.
31. Use your favorite search engine to find retail sources for both of these. Slide rules were still being used as late as the early 1970s, thus local yard and estate sales are a potential source of excellent slide rules at low cost. Clason 1964 explains how to use slide rules.
32. Deppe 2000, pp. 54-64.
33. Greer 2008.
 

Monday, September 30, 2013

Dehydrating food with a solar food dryer


I don’t know a gardener, myself included, who does not sometimes find himself or herself with more fresh food ripe and ready to eat than can be used even after striving for an extended harvest. We want to honor the food I grow and the efforts by many beings to make it available to us by eating all of it. I’ve already written about storing some crops indoors during the winter in this post. However, many crops cannot be stored without some processing. In this post I’ll discuss one of those methods, dehydration or drying, that we use to process some of the food we grow for storage and why and how we use a solar food dryer for this purpose.

I’ve arranged the post into sections. If you’ve not heard of preservation by dehydration before and want to know what it is and why and how to do it, read the whole post. If you know what dehydration is but wonder why anyone would use the sun as a dehydrator rather than buy one of the electrical appliances sold for the purpose, start at Solar Powered Food Dehydration. If you want to skip directly to the design we used and the modifications we made to it, start at Our Solar Food Dryer. And if you just want to know what foods we’ve dried and how we use them, skip to Foods We Dry.

One of the ways to preserve foods for a longer period of time than they normally last after harvest is dehydration or drying. Dehydration reduces the moisture content enough that spoilage organisms such as bacteria, yeasts, or molds cannot survive to attack the food during storage. Dehydration also concentrates the natural sugars in foods, making them as or in some cases more appealing to the palate as the fresh version. And dehydrated foods retain most of their nutrients, though if you choose to blanch them first vitamin C will be destroyed. Drying is well suited to fruits (including starchy fruits such as squash that we usually call vegetables), some green leafy vegetables, herbs, mushrooms, and seeds and grains. With care meats can be dried as well.

Seed and grain crops like beans and corn dry well enough in the range of temperatures and humidity found in a typical residence by spreading them in a thin layer on a screen and perhaps stirring them on occasion. They will dry sufficiently for long-term storage over a time span of a few days to a few weeks depending on their water content at harvest and the relative humidity in your residence. Sunflower seeds can be dried within the seedhead if the relative humidity of the surrounding air is low enough; otherwise remove them from the head and spread them on a screen as you would with beans or corn. I leave corn on its cob and beans in their shells while they are drying, removing the cob or shell after drying is complete. The dried seeds can be stored in glass or plastic containers (glass is preferable if you have a rodent problem).

Most herbs have a low enough water content that they can be dried successfully by the methods suggested in herb books: bundle the stems together and suspend the bundles in a location that does not receive direct sun, or put seedheads into a paper bag and remove the seeds when they and the seedheads are crispy dry. I suspend bundles of herb stems from a clothes drying rack located in a bedroom on the north end of the house, removing the leaves, the part generally used, when they are crispy dry and storing the leaves in a glass jar. I also use an apparatus called a Food PANtrie hanging from a homemade PVC pipe rack in our kitchen, as shown in the photo below, to dry herbs.


By cutting stems of herbs to a size that fits on the screens and piling the stems onto the screens, I can dry herbs successfully indoors through the summer and fall. As with the bundle method, I remove the leaves when they are crispy dry and store the dried leaves in a glass jar. Use your favorite search engine to locate a retail source for the Food PANtrie.

The problem with dehydrating wet foods like fruits and vegetables is that water is not easy to remove from the ripe food. You need to put a lot of heat into water to get it to evaporate out of the food that it’s in and into the air that surrounds the food, and you need to move that now water-laden air away from the food so that drier air can replace it, air that can now receive more water evaporated from the food. One way to do that is to use electricity to heat air and circulate the heated air around the food that you want to dry. The heated, moist air moves out of vents in the top or back of an electric dehydrator while drier, cooler air flows in at the front or bottom of the unit to continue the drying cycle. Countertop-sized and larger electric food dehydrators are available for purchase from brick-and-mortar stores and online. Used ones might be found cheap at a yard or estate sale or through Craigslist. While I don’t discourage anyone from using an electric dehydrator, especially if you don’t have a location suitable for a solar food dryer, I choose not to use an electric dehydrator because our electric usage is already higher than I’d like it to be. Plus during the summer when some of the fruits we dry are harvested it’s hot and humid in the house as it is. I don’t want to add any more heat and humidity to the inside atmosphere.

Solar Powered Food Dehydration

If you don’t want to use electricity to dry wet foods, what can you use? The sun is a source of heat that can be put to use to dry foods with the proper equipment, called a solar food dryer. If you live in an area that can count on several days in a row of hot, sunny, low humidity weather a solar food dryer could be as simple as a wooden frame with food-safe polypropylene screening tacked onto it and covered with finer food-safe screening to exclude insects. You’d place slices of the food you want to dry on the screen frame, cover it with the fine screening, and put it someplace where it will receive sunlight and air circulation for several days until the food is dry. The Food PANtrie I mentioned above was developed for this purpose. However, in the St. Louis region we don’t get this kind of weather during summer and fall, when we have fresh foods available for drying. In our humid climate, I cannot dry even thin-walled hot peppers properly in the Food PANtrie, much less any wetter foods.

To dry them I need a solar food dryer that can collect sufficient solar heat to heat air to at least 120F, preferably hotter, and move the air over the foods to be dried. John Michael Green in his book Green Wizardry points out that the 1970s proved to be a fertile time for the development of solar food dryer designs. The basic design is as follows. A collector (a large, thin box with a black metal bottom covered with a transparent material and provided with vents at the bottom and top) is placed so that sunlight falls on it to heat up the metal. Air that enters at the bottom passes over the heated metal and heats up, reducing its relative humidity. That heated air rises and the rising, dry air is channeled through the top vent and over foods arranged on screens, with the now moist air finally exiting above the screens. A number of individuals and groups developed successful designs. You can find plans in appropriate technology books from the 1970s and by using your favorite search engine to see what the web has on offer.

Our Solar Food Dryer

The solar food dryers designed during the 1970s have a high capacity but are large and difficult to move. They are meant to remain outside for months at a time, which subjects them to the forces of wind and rot. I wanted a smaller version that I can move at will by myself to keep it out of the heavy rains and severe storms that we are prone to receive. The design that Mike used to to make our solar food dryer is found in the book The Solar Food Dryer: How to Make and Use Your Own High-Performance, Sun-Powered Food Dehydrator by Eben Fodor. I recommend this book to anyone who wants to make a portable solar food dryer with a capacity of up to six pounds.

Our dryer is shown in action in the photo at the beginning of this post. Mike made ours to the dimensions specified in the book. You can purchase a kit containing the materials needed to construct this solar food dryer from SunWorks or buy or find materials locally as we did. SunWorks also sells the screen material separately in the size needed for making the dryer to the dimensions in the book. We purchased the screen material from SunWorks.

Mike’s basic carpentry skills and tool set were sufficient to the task, though he made some modifications to the plan to adjust to materials we had on hand and to make aspects of the project easier. He didn’t include the two small side vents in the plan, an oversight on his part. The dryer works fine without them, however. He didn’t include the friction lid support in the plan that holds the vent door open. In the photo below you’ll see that in its place I tied a piece of twine to one of the knobs on the vent door.


The twine can be positioned underneath the window or the brick weighing the window down so that the vent door is held open to the desired amount. That is determined by checking the temperature within the dryer with a probe-type thermometer. The photo above shows ours in action.

Mike didn’t include light bulbs for supplementary heating at night so we either leave the food in the dryer overnight or, when we are concerned that doing so will allow for contamination, take the food out of the dryer in late afternoon and refrigerate it until we put it back into the dryer for further drying. Nor did he include the foam weatherstripping along the top edge of the dryer; it did not prove to be necessary. After attempting three times to cut salvaged storm windows to size and succeeding only in breaking the windows, we gave up and simply laid a storm window on top of the finished dryer, as shown in the photo at the top of the post. I use a brick to weigh the glass down to prevent wind from blowing the glass off the dryer. That’s good enough for the usual breezes we have and I have added another half brick on windier days, but I don’t use the solar food dryer on very windy days to avoid the risk of the glass sheet blowing off. If you live in an area where sunny days are also consistently windy, you’ll need to use the attachment system in the book to keep the glazing on the dryer. If you prefer not to use glass for glazing, polycarbonate sheet is an excellent substitute. It’s easier to cut and lighter than glass, plus it’s unbreakable.

Until the dryer was finished I did not realize that our house doors are too narrow to carry the dryer through the door in its usual orientation. In order to move the dryer in and out of the house, I had to tip it on its side and ease first one pair of legs, then the body of the dryer, and then the other pair of legs through the door. Because of this added difficulty I did not use the dryer as much as I could have. Mike cut the legs shorter to ease this problem, but it was still awkward to get the dryer through the door opening. Once we got our garden shed with its four foot wide door opening, I could carry the dryer through the shed door in its normal orientation. The shed is also much closer to the sunny area where I put the dryer than the house is. Now that I store the dryer in the shed I use it more often. I recommend you measure your door first and modify the plan in the book if needed so your dryer will fit through the door you’ll carry it through.

Not only is the dryer too wide to fit through our house doors but the screens are also too wide to fit through them so I cannot load the screens in the kitchen. Instead I load the screens by placing them on a plastic table outside that is wide enough to hold the screens. I weigh the food before putting it on the screen to make sure I do not put more than 3 pounds of food on a screen, as recommended. Leave enough room between pieces of food for sunlight to strike the collector and for air to pass through the screens, as shown below. The back door is open in the bottom photo, showing two loaded screens in the dryer sitting on wood tracks.


You’ll need to put the dryer someplace where it gets several hours of morning and afternoon sun. If you’re putting the dryer on a lawn with an uneven surface, I suggest putting a sheet of wood on the ground first and placing the dryer on the sheet of wood for added stability.

We found that ants are able to get into the dryer and eat the food when the dryer is not hot enough to kill them, usually when I leave food in the dryer overnight. If you have light bulbs for supplementary heating you may not have problems with ants getting into the food overnight. I solved the ant problem by putting a reused metal can under each leg of the dryer and filling the metal can with water. Ants cannot cross the moat of water in the can. As long as no plant stems contact the solar dryer anywhere else and you refill the cans as the water dries, the dryer will remain ant-free. The other way to solve the ant problem is to remove the food in late afternoon and store in in the refrigerator overnight, returning the food to the dryer the next morning to finish drying.

Foods We Dry

Generally speaking, foods are left to dry until they are leathery or crisp. In July or August foods will dry enough in two to three days of clear to partly cloudy skies. By now the days are short enough and the sun is low enough that it takes four or five days to dry zucchini. If cloudy skies or rain occurs before the food is dry, I store the food in the fridge till sunny weather returns. Also by this time of year the air coming in the dryer is cooler, reducing the drying efficiency further, and we start to get a higher proportion of cloudy to clear days in our region. Solar drying is not practical here after the end of October. In late spring the weather warms enough to start using the dryer.

The foods we have dried so far in our solar food dryer are as follows. I wash and cut ripe food to size before loading it onto the screens. I don’t blanch foods; it doesn’t seem to be necessary.
    Shiitake mushrooms: these dry quickly, in two days. We remove the stems and dry the caps gills up the first day, gills down the second. Other mushrooms would likely dry similarly.
    Herbs: when we have more herbs than we can dry in the house, we dry them in the solar food dryer. Herbs should dry at lower temperatures, under 120F, so I cut down on sunlight entering the dryer by covering the window with a white dish towel and leaving the vent wide open. Herbs dry in a day or two.
    Beef: Mike has dried thin strips of marinated beef into jerky. He only does this in summer, when the temperature inside the dryer goes to 150F and above for at least a few hours, and he removes the beef in late afternoon and keeps it in the fridge overnight if it is not yet dry. It takes two or three days to dry the beef to the jerky state.
    Tomatoes: Any tomato will dry successfully if it is cut into 1/8-1/4” slices and the slices laid on the screens. Since they are watery they need three or more days to dry fully.
    Hot peppers: I tried drying them whole but it took many days to dry them. It worked better to cut them in half and lay the halves on the screens. The time it takes depends on how thick the walls are. Sweet peppers should dry well but I expect they will take longer than hot peppers and would probably dry best if cut into strips.
    Zucchini: I dry the variety ‘Costata Romanesca’ which remains tender even at 4 pounds in size, cutting them into 1/8” think rounds. It’s a great way to make use of the zucchinis you don’t find until they are huge. You don’t need to remove the seeds or skin. Dry the rounds till they are crisp and you have an excellent substitute for tortilla or potato chips!
    Peaches: Halve and pit them, then slice them about 1/8 to 1/4” thick and dry the slices. The sweet concentrated peach flavor is delicious!
    Strawberries: Depending on the size of the berries you can halve or quarter them. As with peaches and tomatoes, dry them thoroughly so they won’t mold in storage. Another concentrated flavor delight!

Just because I haven’t listed it here doesn’t mean it won’t dry well; it just means I haven’t had enough of it at the right time to dry it. Kale, for instance, should dry nicely and I plan to try it when I have enough excess kale.

Sunday, September 8, 2013

Fun With Rain Collection


I write most of my blog posts on rainy days because while I like gardening, I don’t like gardening in the rain. For the last month, until today, we haven’t had any significant rain at our house. This hasn’t been true of all parts of the St. Louis metro area. A week ago the official recording station at Lambert Field reported 1.8 inches of rain from a thunderstorm. Unfortunately for us, that storm just grazed us with less than 0.1 inches of rain, and none of the other scattered storms that day or the previous day passed over us. Today’s rain was more widespread across the metro area. We received about a half inch of rain during the morning, the kind of slow rain that soaks in. We needed it. With luck we’ll get more rain in midweek when a cold front is predicted to pass through.

With so little rain recently, and with August ending with a few days of record highs, for the first time this gardening season I have had to resort to substantial amounts of irrigation to keep the vegetable garden productive. I haven’t needed to irrigate to the degree of last year as our area is not in drought according to the U. S. Drought Monitor, though it is categorized as Abnormally Dry. With the area rivers at reasonable levels for late summer, I haven’t hesitated to use municipal water derived from those rivers for irrigating the vegetable garden. But we do have a backup system for collecting and using rainwater off the roofs of our house and garden shed. This seems like a good time to discuss that system and the uses to which we put the stored water.

Our house was built in two sections with separate roofs. The larger roof slopes are on the main portion of the house. Since the total area of this part of the house is about 800 square feet, each roof slope collects the amount of rain that falls on a 400 square foot area and directs that into a downspout. The other portion of the house, a later extension, is about 300 square feet in area, thus each roof slope for that portion collects rain for a 150 square foot area. The average yearly rainfall in St. Louis is about 40 inches. If we could collect every drop of rain falling on the entire house in a year, that would amount to about 3667 cubic feet of water. At about 7.5 gallons of water to a cubic foot, we could collect about 27,500 gallons of water off the house roof in a year. That would be an average of 75 gallons of water a day. When I’m not irrigating the garden, Mike and I use about 30 to 40 gallons of water a day (total, not per person). In theory, rainwater collection could provide all of our needs and at least some of the garden irrigation ... but we’d have to have a place to hold the water between rains. A five foot high tank in the basement would need to have a footprint of 733 square feet to hold the entirety of the yearly rainfall, taking up nearly the entire area of the basement! In practice, however, the tank would need to hold only about enough water to go the longest stretch between rains that we normally experience. 2012 could be considered a benchmark year in that we went about three months with very little rain. If we assume we need to hold only about 1/4 of our yearly rainfall in a tank at any one time, the size requirement drops to about 1/4 of the square feet in our basement for a 5 foot tall tank that will hold close to 7000 gallons of water. That’s still a much larger tank than we want to have (or pay for having put in). I suspect we could get by with less capacity than that and obtain most of our household water from collected rainwater but thinking more deeply about that is not on the menu for this post. 

Our current set-up cannot store anywhere near 7000 gallons of water. But we find it useful nonetheless, and it will be a real blessing if at any time we have a short-term disruption in municipal water service. Such a disruption could be as simple as a boil order due to a broken pipe or short-term problem at a water plant. Our water filter allows us to filter and drink or cook with the rainwater we collect, thus we will not need to buy bottled water or boil municipal water during a boil order. If for some reason the water utility could not pump water for hours or days (an electrical outage, an earthquake, or who knows what else), we will also have water for bathing and cleaning as well as to water container plants or selected garden plants. In order to go weeks or longer without municipal water, we’d need more holding capacity than we now have for household water, and we’d need more collected water closer to the vegetable gardens. While I’ve giving that eventuality some thought, for the time being our system satisfies our needs.

To collect water off the roof slopes, we use rain barrels. In our case the barrels consist of 55 gallon plastic drums that we obtained free or at $2 per barrel from a number of local sources 10 to 15 years ago, before rain barrels became popular enough that companies with excess barrels realized they had a revenue source on their hands. Even so, when I last purchased non-food-safe 55 gallon drums two or three years ago, we paid only $10 per barrel. That’s a lot less than the fancy rain barrel systems in the gardening catalogs. If you want to make your own rain barrel, check to see who might have used 55 gallon drums available. Soft drink bottlers, processed food manufacturers, and cleaning-product manufacturers or distributors are all possible sources of free or low cost used 55 gallon drums, and there are probably others I haven’t thought of. Food-safe drums are preferable if you can get them, especially for longer-term storage of water you’d like to drink or cook with. Put “rain barrels” into a search engine to find instructions on making your own barrels. The River des Peres Watershed Coalition in the St. Louis area has instructions available here.

If you want to collect or store rainwater in larger amounts than a daisy-chained array of 55 gallon drums offers, put “water tanks” into a search engine. That’s how we found the low-profile 500 gallon water tank we purchased. Farm and rural supply stores also carry large tanks you could use for rainwater collection. I suggest looking at the offerings from a number of retailers in light of careful consideration of your own needs and goals for rainwater storage. That said, you can’t beat a free or cheap used 55 gallon plastic drum with a hose bib plumbed near the bottom of the drum, stuck under a downspout. You’ll soon get a feel for how much water you can collect and determine if that’s sufficient or if you’d like to expand the system.

Below is a photo of one of the single rain barrels under a downspout off the smaller of the two roofs of our house.

Choosing where to plumb the hose bib into the barrel depends on how you want to get the water out of the barrel and on whether the barrel sits on the ground or on a stand. Many of the rain barrels in garden catalogs sit directly on the ground and are intended to be emptied into a watering can. Watering cans might stand a foot tall, so the hose bib has to be high enough to allow a watering can to fit under it. A 55 gallon drum is about 3 feet tall. If the hose bib is a foot up the side, that means that 1/3 of the barrel’s capacity is unavailable for your use. To maximize the amount of water available from a rain barrel, put it on a stand and put the hose bib as close to the bottom of the barrel as is practical. Our barrel sits on two concrete blocks. The hose bib is about 2.5 inches up from the bottom of the barrel. My 10 inch tall watering can easily fits under the hose bib. I can also attach a garden hose to the hose bib to lead the water to other parts of the garden, as long as where I want the water to go is at the same level or lower than the hose bib.

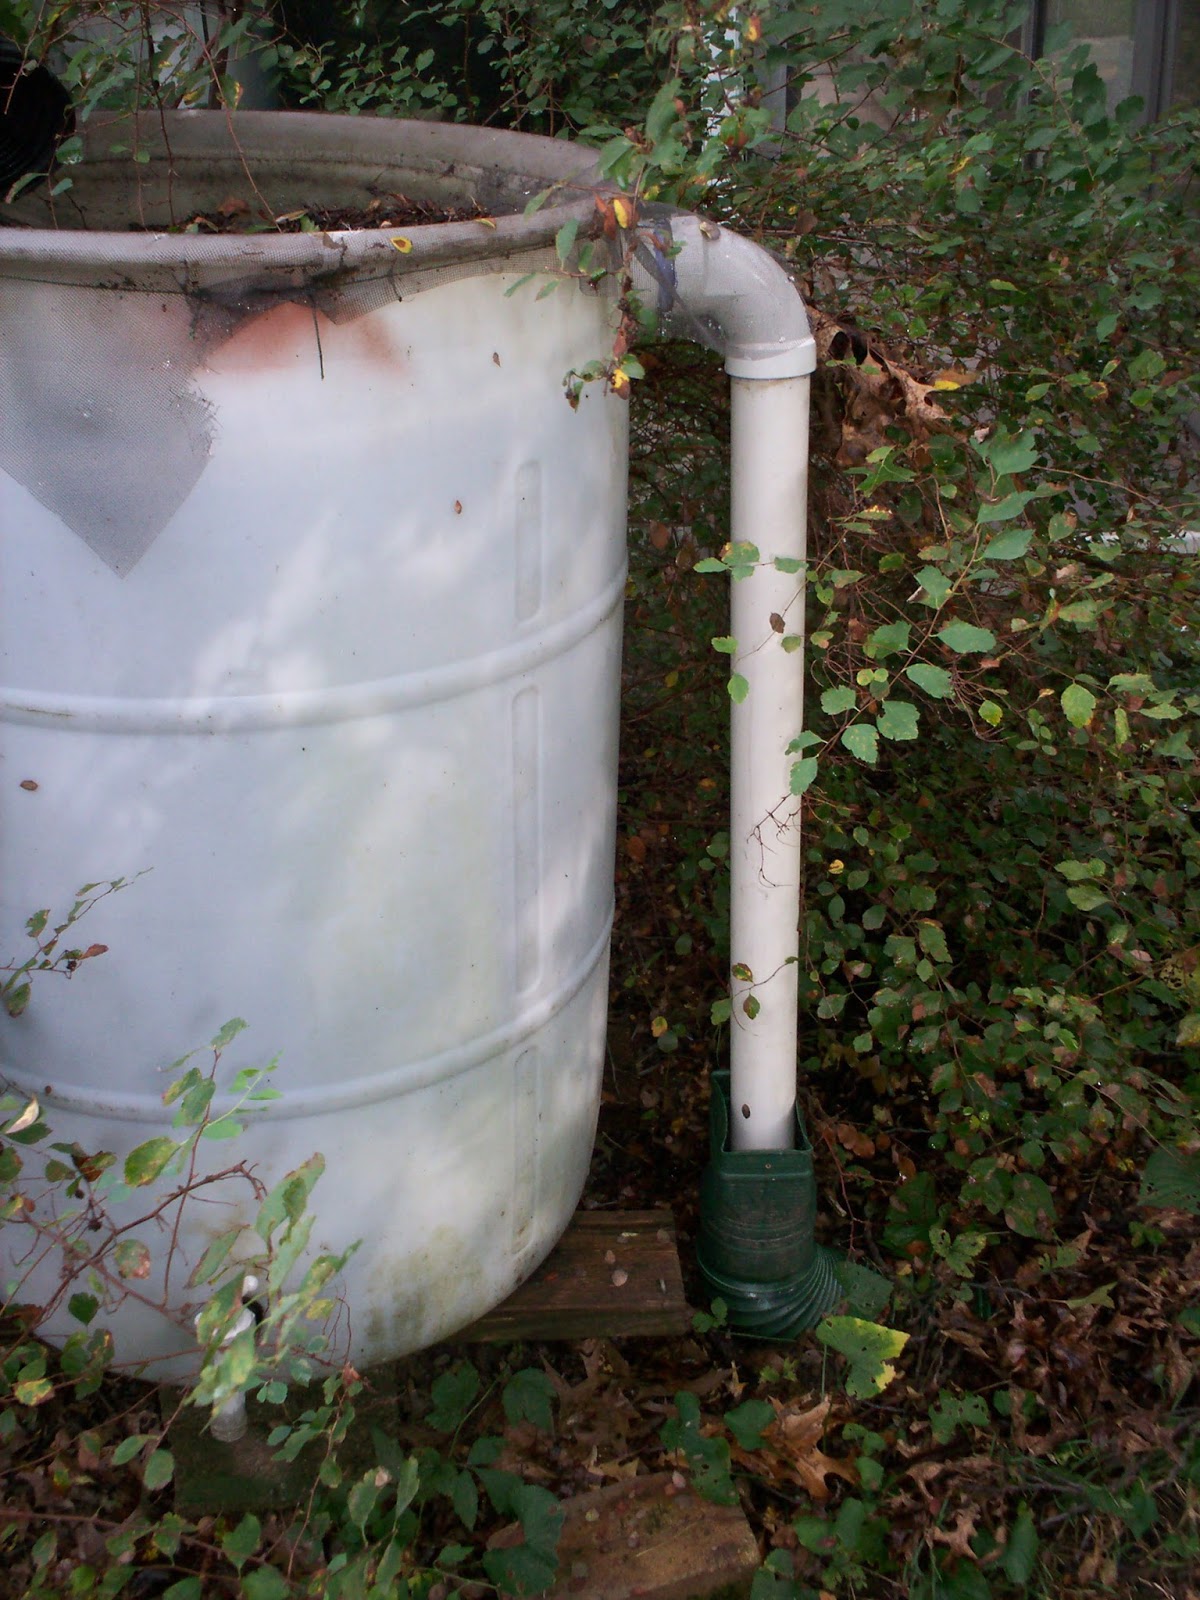
To put the hose bib on, Mike removed half of the top of the barrel so he could reach inside it to place a bulkhead fitting where he wanted the hose bib to attach, rather than using a tapper and screwing the end of the hose bib into the tapped hole as many build-it-yourself rain barrel publications suggest. The bulkhead fitting is less likely to leak, but the tapping method is easier as it does not require removing part of the top of the barrel. The downspout needs to be shortened so the rain barrel fits under it. Because we have a half-open top, we allow the water to come out of the shortened downspout and drop into the barrel through window screening fastened to the top of the barrel. The window screening keeps leaves and twigs out of the barrel and prevents mosquitoes that might hatch in water sitting in the barrel from getting out, as long as I remember to draw the water level down below the screen after rain fills the barrel and mosquitoes lay their eggs in the water while it is above the screen.

We have linked together two 55 gallon drums, with the linkage near the bottom of the tanks, and placed the linked barrels under the downspouts on the main (larger) portion of the house. Otherwise the set-up is the same as for the single barrel. When we made our linked barrels we were concerned that heavy rain could dump water into the barrels at a high enough rate to warrant using 2 inch black flexible hose clamped onto similar sized PVC pieces attached to appropriately sized bulkhead fittings in both barrels for our linkage system. The River des Peres Watershed Association suggests a much easier way to link two barrels together: run a piece of garden hose with two female ends between the hose bibs of two barrels and open the hose bibs. Then both barrels will fill from the bottom up even though the downspout empties into only one barrel. With a hose manifold one could link up more than two barrels in the same way; a little net searching will yield pictures and videos of barrel manifolds. We helped a friend set up three linked barrels this way and she reports that it works well. An advantage to our set-up is that both barrels drain simultaneously, thus the rate of draining, which is proportional to the height distance between the hose bib connection and the height of the water, stays the same for a larger volume of water drained. Remember that the linkage should be at the same height as the hose bib so all barrels fill simultaneously rather than at the top of the barrels.

Freezing in the winter may be a concern depending on where you live. The River des Peres Watershed Coalition recommends removing the barrel from late fall through early spring or opening the hose bib if the barrel is left in place. I open the hose bib and allow the water to drain at the end of the gardening season (sometime in November here), either to the basement storage system or to the rain garden or elsewhere in the yard where irrigation is needed. Then I place a downspout block or a brick under the open hose bib so that water exiting the barrel dissipates its force before it hits the ground. When the temperature is above freezing the water drains out shortly after it falls. If the water doesn’t all drain out before water in the hose bib freezes, for instance when water from melting snow drains into the barrels and then freezes at night, the barrels get some ice in them. So far it hasn’t been enough ice to break the barrels, even after 15 years of exposure to sunlight and winter freezes. Leaving the barrels in place means I can replenish the basement water supply when we get a period of above-normal temperatures and rain as we often do during the winter. If you live in an area where winter is colder than it is in St. Louis, however, please consider carefully whether or not it is feasible to leave your barrels in position. You could attach flexible downspout hose to the end of the downspout during the winter to bypass the barrel, removing it in spring when you want to collect water again.

The Coalition also recommends leveling the area where the rain barrel sits, perhaps even putting down coarse gravel for drainage, and attaching an overflow hose at the top of the barrel. Only one of our four house barrels sits on level ground, the one on the patio. All the other barrels are on a slight slant despite my efforts to level them (obviously not very good efforts!). If the slant is too high the barrels will tip over before they fill, as I know from experience. Fortunately the times they have tipped over have not damaged the barrels or their fittings, and none of the barrels have tipped over for several years now. Fitting overflow hoses onto the barrels will avoid overflow eroding the ground under a barrel and will allow you to direct overflow where it will do good or at least not do harm. The photo below shows the overflow arrangement for one of our sets of linked 55 gallon barrels. PVC pipe extends about 2 inches into the barrel near the top, passes through a fitting to the outside of the barrel, and then passes through fittings to connect it to a vertical PVC pipe that terminates into a piece of flexible downspout hose that itself is connected to buried drainpipe leading to a rain garden. All overflow thus passes directly to the rain garden, where it eventually soaks into the soil. None of the other three house barrels have overflow hoses at this time; overflow runs down the side of the barrel and drops onto the ground. Eventually I will correct that situation as I would like to better use the overflow water.


How much rain can our barrels collect before overflowing? It turns out that one inch of rain falling on a 1000 square foot surface amounts to 625 gallons of water if every drop is collected. That means that our 150 square foot roof areas could collect 94 gallons of water from a one inch rainfall. In practice I have observed that a half inch of rain fills the single 55 gallon drum under the downspouts for those roof areas, in line with expectation. Each of the 400 square foot roof areas on the main part of the house could collect 250 gallons of water from a one inch rainfall. Since we have two linked 55 gallon barrels under each downspout, the linked barrels are filled by a rainfall a little under a half inch. Rainfall events of an inch or greater are not uncommon in the St. Louis area, but neither are periods of a few to several weeks with rain of an inch or less. Having more capacity under each downspout would allow me to hold more rainfall for a dry spell.

With just these barrels the best use for collected rainwater is watering container gardens, collecting water for rain gardens or small ponds, or watering small areas of gardens with soaker hoses designed for rain barrels. I wanted to collect rainwater for household uses as well. To do this, we’ve set up eight food-safe 55 gallon drums in the basement of our house, with no modifications to the drums. To fill one of these drums we hook up enough garden hose to reach from a rain barrel to a basement drum, remove one of the bungs from the basement drum, and put the hose into the bung. We can thus use gravity to transfer water from a rain barrel into the drum. This allows us to store some of the rainwater we collect for later use. To get the water out of the basement drums, we got this hand pump, to which Mike attached enough PVC pipe to the inlet end to reach from an open bung hole to the bottom of the drum. He also attached PVC pipe to the outlet end so we can pump the water into a bucket or a watering can. The set-up is shown in the photo below. When the drum is emptied, we move the pump to a full drum and refill the empty drum from one of the rain barrels. We carry the water we pump out to where we need it.

When we still had a toilet with a 3.5 gallon flush, we used some of the rainwater we collected to flush the toilet. Now that we have a 1.6 gallon flush toilet I prefer not to splash blackwater out of the toilet as was inevitable when we bucket-flushed the toilet. These days the primary use for the rainwater in the basement drums is for drinking water, along with watering houseplants and started seedlings during the winter months. We filter the rainwater with this filter with four ceramic filter elements installed and drink the filtered water. We can and sometimes do use it for cooking as well. I like the taste of the filtered rainwater better than that of our municipal water, which is drawn from the Missouri, Meramec, and Mississippi Rivers and requires considerable treatment before it can be drunk. While I can’t speak specifically about health issues, I feel quite confident of the fitness of the filtered rainwater for drinking in spite of the asphalt-shingled roof (although when it next needs replacement, we’ll replace it with an enameled metal roof, the preferred choice for rainwater collection). The rain doesn’t have much contact time with the shingles and the roof was already in service for eight years before we collected water from it, so I suspect most of the volatile compounds of concern had already leached out of the shingles. The ceramic filters will filter out bacteria, which I suspect is the major concern with water collected off a roof. They will last for many years with occasional cleaning. However, I urge anyone who wants to drink collected rainwater to educate yourself thoroughly and consider your own circumstances, which may differ from mine. What I’ve said is for informational purposes only!

At any one time the barrels underneath the house downspouts can hold up to 300 gallons of water. That’s not enough stored water to carry the container plants through a several week long drought, much less the other plantings in the quarter acre of ground downhill of the barrels. The vegetable gardens are uphill of the house barrels so they cannot be watered from them except by hand-carrying water. After we got our garden shed last winter, which sits at about the same level as the vegetable garden, we set up a system to collect rainwater from the shed roof in a 500 gallon low-profile water tank which then can water the vegetable garden by gravity feed. The pictures below show the tank in back of the shed and details of how Mike hung the gutters and downspout.

The shed had an enameled metal roof as an option so we chose it over a shingled roof. Rather than attaching metal hangers to the shed and hanging the gutters from them, Mike made platforms from scrap wood, attached them to the sides of the shed, and screwed the bottom of the gutters to the platforms. We’ll have to see how long the platforms hold up to environmental conditions. Looking at the third and fourth photos you can see that the gutters on the sides of the sheds do not have end pieces attached. Instead they empty into the gutter on the rear of the shed. That gutter has a flexible downspout attached to it and to a provided opening at the top of the tank. The tank came with a leaf screen which is under the downspout opening. The tank has two openings on the side, one near the bottom and one near the top. Mike used PVC pipe to attach a hose bib to the bottom opening, as seen in the photo below. I attached a two-way hose valve to the hose bib. One side has a short length of hose on it, for measuring the level of water in the tank and for filling a watering can. I can attach garden and soaker hose to the other side for watering the vegetable garden.


The top opening on the tank is for overflow. The first of the shed photos shows the entire overflow system (the PVC piping on the right of the tank). The photo below shows in detail how the PVC pipe attaches to the overflow opening. Later this fall I plan to put in a rain garden to be fed from the overflow. The tank sits directly on level ground and I will put the rain garden slightly downhill of the tank so the overflow water leads away from the tank.

With a one inch rainfall falling onto the 120 square foot shed roof 75 gallons of rainwater can be collected. Since the tank holds 500 gallons it takes close to 7 inches of rain to fill the tank. We haven’t had that much rain since we finished the collection system around the beginning of July. Right now, including the half inch of rain we received today, the tank holds about 300 gallons of water. That’s as much as is held by all the other rain barrels put together. For the past week I’ve been watering the container plants from the tank in back of the shed, as I had emptied the rain barrels onto part of a perennial border, into the rain garden since it had not rained in a month, and onto the container plants and spring-planted trees and shrubs. The new tank has already proven its worth. I expect to use it more during the remainder of the growing season and am thinking about how to make it more useful for watering the vegetable garden next year.

With the downspout attached directly to the 500 gallon tank I am concerned about freezing of the water in the tank or in the downspout over the winter. What I expect to do is disconnect the downspout and add a piece of downspout to it sufficient to reach the ground, as well as drain the tank. When spring comes it will be a simple matter to close the hose bib, clean the leaf screen, and reattach the downspout.

In the long run, I’d like to have more water stored in tanks or ponds at vegetable-garden level, as 500 gallons won’t go far in a drought like we had last year. Also when the rain barrels at the house need to be replaced, we’d like to replace them with higher-capacity tanks or linked barrels and have more rain gardens or berms to hold overflow water. But this isn’t bad for a start.