Monday, September 30, 2013

Dehydrating food with a solar food dryer


I don’t know a gardener, myself included, who does not sometimes find himself or herself with more fresh food ripe and ready to eat than can be used even after striving for an extended harvest. We want to honor the food I grow and the efforts by many beings to make it available to us by eating all of it. I’ve already written about storing some crops indoors during the winter in this post. However, many crops cannot be stored without some processing. In this post I’ll discuss one of those methods, dehydration or drying, that we use to process some of the food we grow for storage and why and how we use a solar food dryer for this purpose.

I’ve arranged the post into sections. If you’ve not heard of preservation by dehydration before and want to know what it is and why and how to do it, read the whole post. If you know what dehydration is but wonder why anyone would use the sun as a dehydrator rather than buy one of the electrical appliances sold for the purpose, start at Solar Powered Food Dehydration. If you want to skip directly to the design we used and the modifications we made to it, start at Our Solar Food Dryer. And if you just want to know what foods we’ve dried and how we use them, skip to Foods We Dry.

One of the ways to preserve foods for a longer period of time than they normally last after harvest is dehydration or drying. Dehydration reduces the moisture content enough that spoilage organisms such as bacteria, yeasts, or molds cannot survive to attack the food during storage. Dehydration also concentrates the natural sugars in foods, making them as or in some cases more appealing to the palate as the fresh version. And dehydrated foods retain most of their nutrients, though if you choose to blanch them first vitamin C will be destroyed. Drying is well suited to fruits (including starchy fruits such as squash that we usually call vegetables), some green leafy vegetables, herbs, mushrooms, and seeds and grains. With care meats can be dried as well.

Seed and grain crops like beans and corn dry well enough in the range of temperatures and humidity found in a typical residence by spreading them in a thin layer on a screen and perhaps stirring them on occasion. They will dry sufficiently for long-term storage over a time span of a few days to a few weeks depending on their water content at harvest and the relative humidity in your residence. Sunflower seeds can be dried within the seedhead if the relative humidity of the surrounding air is low enough; otherwise remove them from the head and spread them on a screen as you would with beans or corn. I leave corn on its cob and beans in their shells while they are drying, removing the cob or shell after drying is complete. The dried seeds can be stored in glass or plastic containers (glass is preferable if you have a rodent problem).

Most herbs have a low enough water content that they can be dried successfully by the methods suggested in herb books: bundle the stems together and suspend the bundles in a location that does not receive direct sun, or put seedheads into a paper bag and remove the seeds when they and the seedheads are crispy dry. I suspend bundles of herb stems from a clothes drying rack located in a bedroom on the north end of the house, removing the leaves, the part generally used, when they are crispy dry and storing the leaves in a glass jar. I also use an apparatus called a Food PANtrie hanging from a homemade PVC pipe rack in our kitchen, as shown in the photo below, to dry herbs.


By cutting stems of herbs to a size that fits on the screens and piling the stems onto the screens, I can dry herbs successfully indoors through the summer and fall. As with the bundle method, I remove the leaves when they are crispy dry and store the dried leaves in a glass jar. Use your favorite search engine to locate a retail source for the Food PANtrie.

The problem with dehydrating wet foods like fruits and vegetables is that water is not easy to remove from the ripe food. You need to put a lot of heat into water to get it to evaporate out of the food that it’s in and into the air that surrounds the food, and you need to move that now water-laden air away from the food so that drier air can replace it, air that can now receive more water evaporated from the food. One way to do that is to use electricity to heat air and circulate the heated air around the food that you want to dry. The heated, moist air moves out of vents in the top or back of an electric dehydrator while drier, cooler air flows in at the front or bottom of the unit to continue the drying cycle. Countertop-sized and larger electric food dehydrators are available for purchase from brick-and-mortar stores and online. Used ones might be found cheap at a yard or estate sale or through Craigslist. While I don’t discourage anyone from using an electric dehydrator, especially if you don’t have a location suitable for a solar food dryer, I choose not to use an electric dehydrator because our electric usage is already higher than I’d like it to be. Plus during the summer when some of the fruits we dry are harvested it’s hot and humid in the house as it is. I don’t want to add any more heat and humidity to the inside atmosphere.

Solar Powered Food Dehydration

If you don’t want to use electricity to dry wet foods, what can you use? The sun is a source of heat that can be put to use to dry foods with the proper equipment, called a solar food dryer. If you live in an area that can count on several days in a row of hot, sunny, low humidity weather a solar food dryer could be as simple as a wooden frame with food-safe polypropylene screening tacked onto it and covered with finer food-safe screening to exclude insects. You’d place slices of the food you want to dry on the screen frame, cover it with the fine screening, and put it someplace where it will receive sunlight and air circulation for several days until the food is dry. The Food PANtrie I mentioned above was developed for this purpose. However, in the St. Louis region we don’t get this kind of weather during summer and fall, when we have fresh foods available for drying. In our humid climate, I cannot dry even thin-walled hot peppers properly in the Food PANtrie, much less any wetter foods.

To dry them I need a solar food dryer that can collect sufficient solar heat to heat air to at least 120F, preferably hotter, and move the air over the foods to be dried. John Michael Green in his book Green Wizardry points out that the 1970s proved to be a fertile time for the development of solar food dryer designs. The basic design is as follows. A collector (a large, thin box with a black metal bottom covered with a transparent material and provided with vents at the bottom and top) is placed so that sunlight falls on it to heat up the metal. Air that enters at the bottom passes over the heated metal and heats up, reducing its relative humidity. That heated air rises and the rising, dry air is channeled through the top vent and over foods arranged on screens, with the now moist air finally exiting above the screens. A number of individuals and groups developed successful designs. You can find plans in appropriate technology books from the 1970s and by using your favorite search engine to see what the web has on offer.

Our Solar Food Dryer

The solar food dryers designed during the 1970s have a high capacity but are large and difficult to move. They are meant to remain outside for months at a time, which subjects them to the forces of wind and rot. I wanted a smaller version that I can move at will by myself to keep it out of the heavy rains and severe storms that we are prone to receive. The design that Mike used to to make our solar food dryer is found in the book The Solar Food Dryer: How to Make and Use Your Own High-Performance, Sun-Powered Food Dehydrator by Eben Fodor. I recommend this book to anyone who wants to make a portable solar food dryer with a capacity of up to six pounds.

Our dryer is shown in action in the photo at the beginning of this post. Mike made ours to the dimensions specified in the book. You can purchase a kit containing the materials needed to construct this solar food dryer from SunWorks or buy or find materials locally as we did. SunWorks also sells the screen material separately in the size needed for making the dryer to the dimensions in the book. We purchased the screen material from SunWorks.

Mike’s basic carpentry skills and tool set were sufficient to the task, though he made some modifications to the plan to adjust to materials we had on hand and to make aspects of the project easier. He didn’t include the two small side vents in the plan, an oversight on his part. The dryer works fine without them, however. He didn’t include the friction lid support in the plan that holds the vent door open. In the photo below you’ll see that in its place I tied a piece of twine to one of the knobs on the vent door.


The twine can be positioned underneath the window or the brick weighing the window down so that the vent door is held open to the desired amount. That is determined by checking the temperature within the dryer with a probe-type thermometer. The photo above shows ours in action.

Mike didn’t include light bulbs for supplementary heating at night so we either leave the food in the dryer overnight or, when we are concerned that doing so will allow for contamination, take the food out of the dryer in late afternoon and refrigerate it until we put it back into the dryer for further drying. Nor did he include the foam weatherstripping along the top edge of the dryer; it did not prove to be necessary. After attempting three times to cut salvaged storm windows to size and succeeding only in breaking the windows, we gave up and simply laid a storm window on top of the finished dryer, as shown in the photo at the top of the post. I use a brick to weigh the glass down to prevent wind from blowing the glass off the dryer. That’s good enough for the usual breezes we have and I have added another half brick on windier days, but I don’t use the solar food dryer on very windy days to avoid the risk of the glass sheet blowing off. If you live in an area where sunny days are also consistently windy, you’ll need to use the attachment system in the book to keep the glazing on the dryer. If you prefer not to use glass for glazing, polycarbonate sheet is an excellent substitute. It’s easier to cut and lighter than glass, plus it’s unbreakable.

Until the dryer was finished I did not realize that our house doors are too narrow to carry the dryer through the door in its usual orientation. In order to move the dryer in and out of the house, I had to tip it on its side and ease first one pair of legs, then the body of the dryer, and then the other pair of legs through the door. Because of this added difficulty I did not use the dryer as much as I could have. Mike cut the legs shorter to ease this problem, but it was still awkward to get the dryer through the door opening. Once we got our garden shed with its four foot wide door opening, I could carry the dryer through the shed door in its normal orientation. The shed is also much closer to the sunny area where I put the dryer than the house is. Now that I store the dryer in the shed I use it more often. I recommend you measure your door first and modify the plan in the book if needed so your dryer will fit through the door you’ll carry it through.

Not only is the dryer too wide to fit through our house doors but the screens are also too wide to fit through them so I cannot load the screens in the kitchen. Instead I load the screens by placing them on a plastic table outside that is wide enough to hold the screens. I weigh the food before putting it on the screen to make sure I do not put more than 3 pounds of food on a screen, as recommended. Leave enough room between pieces of food for sunlight to strike the collector and for air to pass through the screens, as shown below. The back door is open in the bottom photo, showing two loaded screens in the dryer sitting on wood tracks.


You’ll need to put the dryer someplace where it gets several hours of morning and afternoon sun. If you’re putting the dryer on a lawn with an uneven surface, I suggest putting a sheet of wood on the ground first and placing the dryer on the sheet of wood for added stability.

We found that ants are able to get into the dryer and eat the food when the dryer is not hot enough to kill them, usually when I leave food in the dryer overnight. If you have light bulbs for supplementary heating you may not have problems with ants getting into the food overnight. I solved the ant problem by putting a reused metal can under each leg of the dryer and filling the metal can with water. Ants cannot cross the moat of water in the can. As long as no plant stems contact the solar dryer anywhere else and you refill the cans as the water dries, the dryer will remain ant-free. The other way to solve the ant problem is to remove the food in late afternoon and store in in the refrigerator overnight, returning the food to the dryer the next morning to finish drying.

Foods We Dry

Generally speaking, foods are left to dry until they are leathery or crisp. In July or August foods will dry enough in two to three days of clear to partly cloudy skies. By now the days are short enough and the sun is low enough that it takes four or five days to dry zucchini. If cloudy skies or rain occurs before the food is dry, I store the food in the fridge till sunny weather returns. Also by this time of year the air coming in the dryer is cooler, reducing the drying efficiency further, and we start to get a higher proportion of cloudy to clear days in our region. Solar drying is not practical here after the end of October. In late spring the weather warms enough to start using the dryer.

The foods we have dried so far in our solar food dryer are as follows. I wash and cut ripe food to size before loading it onto the screens. I don’t blanch foods; it doesn’t seem to be necessary.
    Shiitake mushrooms: these dry quickly, in two days. We remove the stems and dry the caps gills up the first day, gills down the second. Other mushrooms would likely dry similarly.
    Herbs: when we have more herbs than we can dry in the house, we dry them in the solar food dryer. Herbs should dry at lower temperatures, under 120F, so I cut down on sunlight entering the dryer by covering the window with a white dish towel and leaving the vent wide open. Herbs dry in a day or two.
    Beef: Mike has dried thin strips of marinated beef into jerky. He only does this in summer, when the temperature inside the dryer goes to 150F and above for at least a few hours, and he removes the beef in late afternoon and keeps it in the fridge overnight if it is not yet dry. It takes two or three days to dry the beef to the jerky state.
    Tomatoes: Any tomato will dry successfully if it is cut into 1/8-1/4” slices and the slices laid on the screens. Since they are watery they need three or more days to dry fully.
    Hot peppers: I tried drying them whole but it took many days to dry them. It worked better to cut them in half and lay the halves on the screens. The time it takes depends on how thick the walls are. Sweet peppers should dry well but I expect they will take longer than hot peppers and would probably dry best if cut into strips.
    Zucchini: I dry the variety ‘Costata Romanesca’ which remains tender even at 4 pounds in size, cutting them into 1/8” think rounds. It’s a great way to make use of the zucchinis you don’t find until they are huge. You don’t need to remove the seeds or skin. Dry the rounds till they are crisp and you have an excellent substitute for tortilla or potato chips!
    Peaches: Halve and pit them, then slice them about 1/8 to 1/4” thick and dry the slices. The sweet concentrated peach flavor is delicious!
    Strawberries: Depending on the size of the berries you can halve or quarter them. As with peaches and tomatoes, dry them thoroughly so they won’t mold in storage. Another concentrated flavor delight!

Just because I haven’t listed it here doesn’t mean it won’t dry well; it just means I haven’t had enough of it at the right time to dry it. Kale, for instance, should dry nicely and I plan to try it when I have enough excess kale.

Sunday, September 8, 2013

Fun With Rain Collection


I write most of my blog posts on rainy days because while I like gardening, I don’t like gardening in the rain. For the last month, until today, we haven’t had any significant rain at our house. This hasn’t been true of all parts of the St. Louis metro area. A week ago the official recording station at Lambert Field reported 1.8 inches of rain from a thunderstorm. Unfortunately for us, that storm just grazed us with less than 0.1 inches of rain, and none of the other scattered storms that day or the previous day passed over us. Today’s rain was more widespread across the metro area. We received about a half inch of rain during the morning, the kind of slow rain that soaks in. We needed it. With luck we’ll get more rain in midweek when a cold front is predicted to pass through.

With so little rain recently, and with August ending with a few days of record highs, for the first time this gardening season I have had to resort to substantial amounts of irrigation to keep the vegetable garden productive. I haven’t needed to irrigate to the degree of last year as our area is not in drought according to the U. S. Drought Monitor, though it is categorized as Abnormally Dry. With the area rivers at reasonable levels for late summer, I haven’t hesitated to use municipal water derived from those rivers for irrigating the vegetable garden. But we do have a backup system for collecting and using rainwater off the roofs of our house and garden shed. This seems like a good time to discuss that system and the uses to which we put the stored water.

Our house was built in two sections with separate roofs. The larger roof slopes are on the main portion of the house. Since the total area of this part of the house is about 800 square feet, each roof slope collects the amount of rain that falls on a 400 square foot area and directs that into a downspout. The other portion of the house, a later extension, is about 300 square feet in area, thus each roof slope for that portion collects rain for a 150 square foot area. The average yearly rainfall in St. Louis is about 40 inches. If we could collect every drop of rain falling on the entire house in a year, that would amount to about 3667 cubic feet of water. At about 7.5 gallons of water to a cubic foot, we could collect about 27,500 gallons of water off the house roof in a year. That would be an average of 75 gallons of water a day. When I’m not irrigating the garden, Mike and I use about 30 to 40 gallons of water a day (total, not per person). In theory, rainwater collection could provide all of our needs and at least some of the garden irrigation ... but we’d have to have a place to hold the water between rains. A five foot high tank in the basement would need to have a footprint of 733 square feet to hold the entirety of the yearly rainfall, taking up nearly the entire area of the basement! In practice, however, the tank would need to hold only about enough water to go the longest stretch between rains that we normally experience. 2012 could be considered a benchmark year in that we went about three months with very little rain. If we assume we need to hold only about 1/4 of our yearly rainfall in a tank at any one time, the size requirement drops to about 1/4 of the square feet in our basement for a 5 foot tall tank that will hold close to 7000 gallons of water. That’s still a much larger tank than we want to have (or pay for having put in). I suspect we could get by with less capacity than that and obtain most of our household water from collected rainwater but thinking more deeply about that is not on the menu for this post. 

Our current set-up cannot store anywhere near 7000 gallons of water. But we find it useful nonetheless, and it will be a real blessing if at any time we have a short-term disruption in municipal water service. Such a disruption could be as simple as a boil order due to a broken pipe or short-term problem at a water plant. Our water filter allows us to filter and drink or cook with the rainwater we collect, thus we will not need to buy bottled water or boil municipal water during a boil order. If for some reason the water utility could not pump water for hours or days (an electrical outage, an earthquake, or who knows what else), we will also have water for bathing and cleaning as well as to water container plants or selected garden plants. In order to go weeks or longer without municipal water, we’d need more holding capacity than we now have for household water, and we’d need more collected water closer to the vegetable gardens. While I’ve giving that eventuality some thought, for the time being our system satisfies our needs.

To collect water off the roof slopes, we use rain barrels. In our case the barrels consist of 55 gallon plastic drums that we obtained free or at $2 per barrel from a number of local sources 10 to 15 years ago, before rain barrels became popular enough that companies with excess barrels realized they had a revenue source on their hands. Even so, when I last purchased non-food-safe 55 gallon drums two or three years ago, we paid only $10 per barrel. That’s a lot less than the fancy rain barrel systems in the gardening catalogs. If you want to make your own rain barrel, check to see who might have used 55 gallon drums available. Soft drink bottlers, processed food manufacturers, and cleaning-product manufacturers or distributors are all possible sources of free or low cost used 55 gallon drums, and there are probably others I haven’t thought of. Food-safe drums are preferable if you can get them, especially for longer-term storage of water you’d like to drink or cook with. Put “rain barrels” into a search engine to find instructions on making your own barrels. The River des Peres Watershed Coalition in the St. Louis area has instructions available here.

If you want to collect or store rainwater in larger amounts than a daisy-chained array of 55 gallon drums offers, put “water tanks” into a search engine. That’s how we found the low-profile 500 gallon water tank we purchased. Farm and rural supply stores also carry large tanks you could use for rainwater collection. I suggest looking at the offerings from a number of retailers in light of careful consideration of your own needs and goals for rainwater storage. That said, you can’t beat a free or cheap used 55 gallon plastic drum with a hose bib plumbed near the bottom of the drum, stuck under a downspout. You’ll soon get a feel for how much water you can collect and determine if that’s sufficient or if you’d like to expand the system.

Below is a photo of one of the single rain barrels under a downspout off the smaller of the two roofs of our house.

Choosing where to plumb the hose bib into the barrel depends on how you want to get the water out of the barrel and on whether the barrel sits on the ground or on a stand. Many of the rain barrels in garden catalogs sit directly on the ground and are intended to be emptied into a watering can. Watering cans might stand a foot tall, so the hose bib has to be high enough to allow a watering can to fit under it. A 55 gallon drum is about 3 feet tall. If the hose bib is a foot up the side, that means that 1/3 of the barrel’s capacity is unavailable for your use. To maximize the amount of water available from a rain barrel, put it on a stand and put the hose bib as close to the bottom of the barrel as is practical. Our barrel sits on two concrete blocks. The hose bib is about 2.5 inches up from the bottom of the barrel. My 10 inch tall watering can easily fits under the hose bib. I can also attach a garden hose to the hose bib to lead the water to other parts of the garden, as long as where I want the water to go is at the same level or lower than the hose bib.

To put the hose bib on, Mike removed half of the top of the barrel so he could reach inside it to place a bulkhead fitting where he wanted the hose bib to attach, rather than using a tapper and screwing the end of the hose bib into the tapped hole as many build-it-yourself rain barrel publications suggest. The bulkhead fitting is less likely to leak, but the tapping method is easier as it does not require removing part of the top of the barrel. The downspout needs to be shortened so the rain barrel fits under it. Because we have a half-open top, we allow the water to come out of the shortened downspout and drop into the barrel through window screening fastened to the top of the barrel. The window screening keeps leaves and twigs out of the barrel and prevents mosquitoes that might hatch in water sitting in the barrel from getting out, as long as I remember to draw the water level down below the screen after rain fills the barrel and mosquitoes lay their eggs in the water while it is above the screen.

We have linked together two 55 gallon drums, with the linkage near the bottom of the tanks, and placed the linked barrels under the downspouts on the main (larger) portion of the house. Otherwise the set-up is the same as for the single barrel. When we made our linked barrels we were concerned that heavy rain could dump water into the barrels at a high enough rate to warrant using 2 inch black flexible hose clamped onto similar sized PVC pieces attached to appropriately sized bulkhead fittings in both barrels for our linkage system. The River des Peres Watershed Association suggests a much easier way to link two barrels together: run a piece of garden hose with two female ends between the hose bibs of two barrels and open the hose bibs. Then both barrels will fill from the bottom up even though the downspout empties into only one barrel. With a hose manifold one could link up more than two barrels in the same way; a little net searching will yield pictures and videos of barrel manifolds. We helped a friend set up three linked barrels this way and she reports that it works well. An advantage to our set-up is that both barrels drain simultaneously, thus the rate of draining, which is proportional to the height distance between the hose bib connection and the height of the water, stays the same for a larger volume of water drained. Remember that the linkage should be at the same height as the hose bib so all barrels fill simultaneously rather than at the top of the barrels.

Freezing in the winter may be a concern depending on where you live. The River des Peres Watershed Coalition recommends removing the barrel from late fall through early spring or opening the hose bib if the barrel is left in place. I open the hose bib and allow the water to drain at the end of the gardening season (sometime in November here), either to the basement storage system or to the rain garden or elsewhere in the yard where irrigation is needed. Then I place a downspout block or a brick under the open hose bib so that water exiting the barrel dissipates its force before it hits the ground. When the temperature is above freezing the water drains out shortly after it falls. If the water doesn’t all drain out before water in the hose bib freezes, for instance when water from melting snow drains into the barrels and then freezes at night, the barrels get some ice in them. So far it hasn’t been enough ice to break the barrels, even after 15 years of exposure to sunlight and winter freezes. Leaving the barrels in place means I can replenish the basement water supply when we get a period of above-normal temperatures and rain as we often do during the winter. If you live in an area where winter is colder than it is in St. Louis, however, please consider carefully whether or not it is feasible to leave your barrels in position. You could attach flexible downspout hose to the end of the downspout during the winter to bypass the barrel, removing it in spring when you want to collect water again.

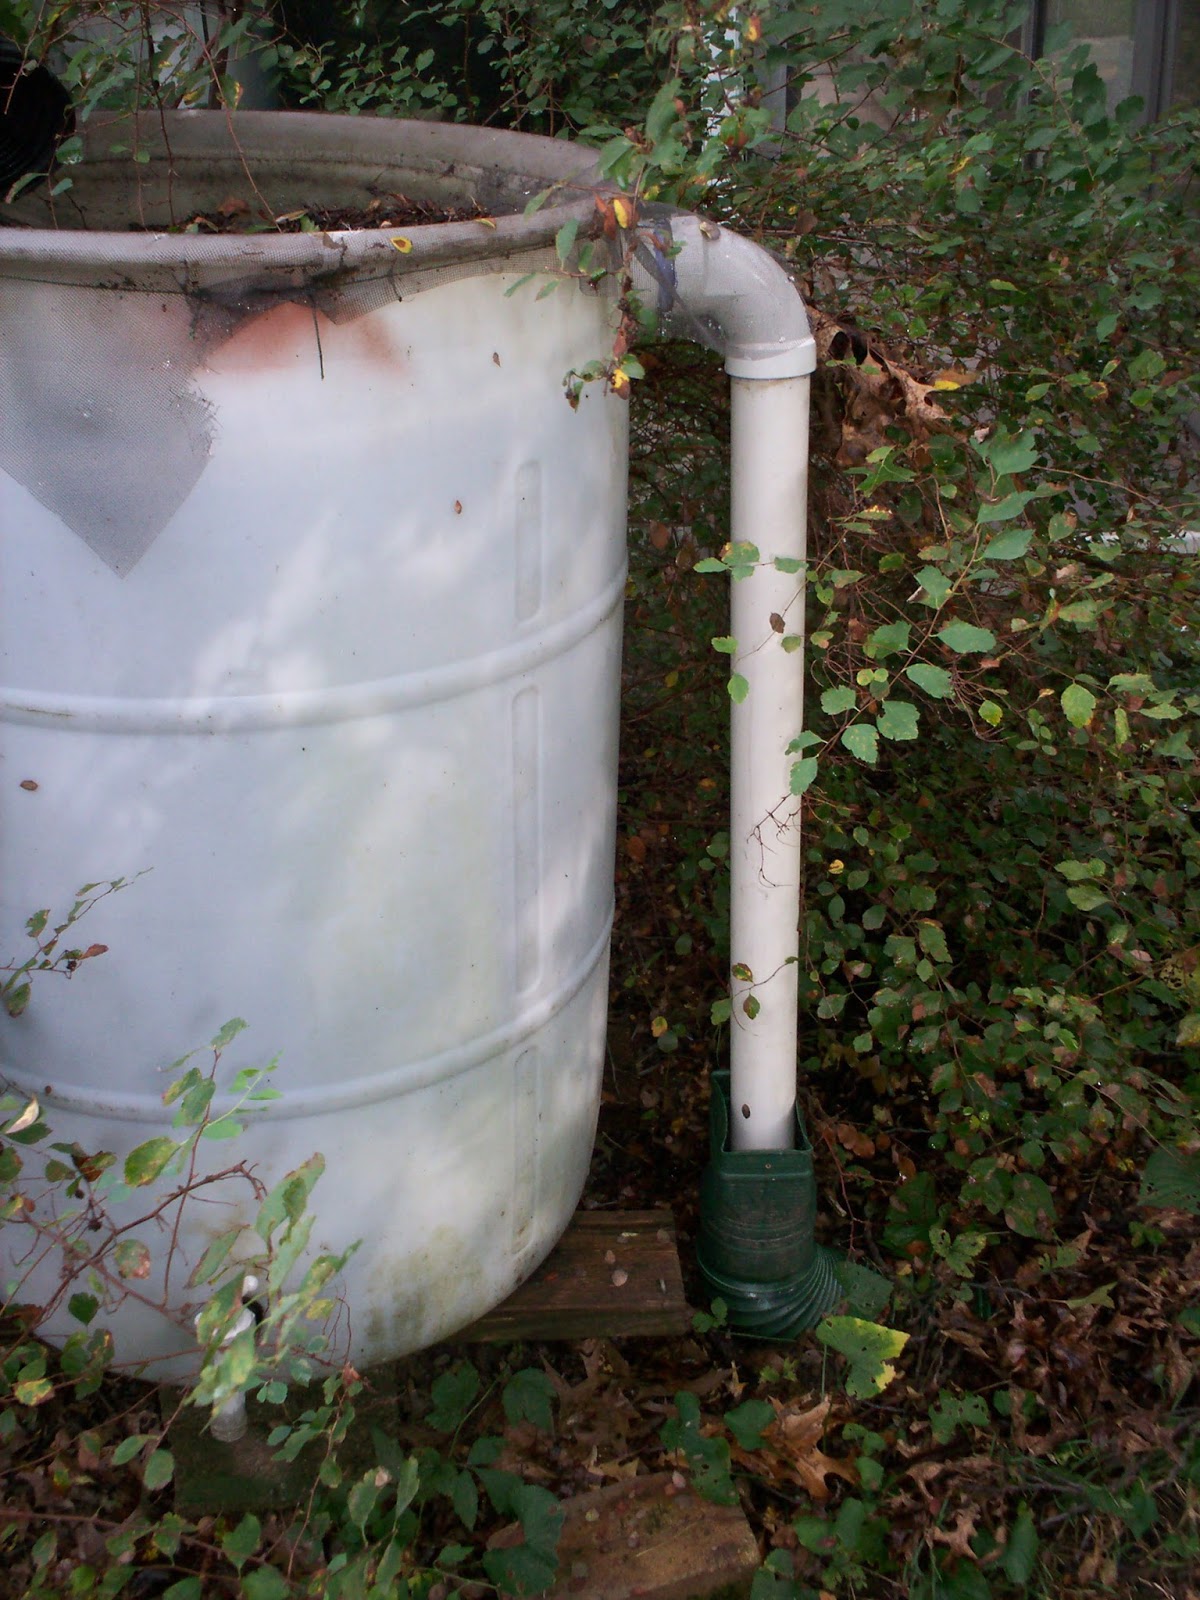
The Coalition also recommends leveling the area where the rain barrel sits, perhaps even putting down coarse gravel for drainage, and attaching an overflow hose at the top of the barrel. Only one of our four house barrels sits on level ground, the one on the patio. All the other barrels are on a slight slant despite my efforts to level them (obviously not very good efforts!). If the slant is too high the barrels will tip over before they fill, as I know from experience. Fortunately the times they have tipped over have not damaged the barrels or their fittings, and none of the barrels have tipped over for several years now. Fitting overflow hoses onto the barrels will avoid overflow eroding the ground under a barrel and will allow you to direct overflow where it will do good or at least not do harm. The photo below shows the overflow arrangement for one of our sets of linked 55 gallon barrels. PVC pipe extends about 2 inches into the barrel near the top, passes through a fitting to the outside of the barrel, and then passes through fittings to connect it to a vertical PVC pipe that terminates into a piece of flexible downspout hose that itself is connected to buried drainpipe leading to a rain garden. All overflow thus passes directly to the rain garden, where it eventually soaks into the soil. None of the other three house barrels have overflow hoses at this time; overflow runs down the side of the barrel and drops onto the ground. Eventually I will correct that situation as I would like to better use the overflow water.


How much rain can our barrels collect before overflowing? It turns out that one inch of rain falling on a 1000 square foot surface amounts to 625 gallons of water if every drop is collected. That means that our 150 square foot roof areas could collect 94 gallons of water from a one inch rainfall. In practice I have observed that a half inch of rain fills the single 55 gallon drum under the downspouts for those roof areas, in line with expectation. Each of the 400 square foot roof areas on the main part of the house could collect 250 gallons of water from a one inch rainfall. Since we have two linked 55 gallon barrels under each downspout, the linked barrels are filled by a rainfall a little under a half inch. Rainfall events of an inch or greater are not uncommon in the St. Louis area, but neither are periods of a few to several weeks with rain of an inch or less. Having more capacity under each downspout would allow me to hold more rainfall for a dry spell.

With just these barrels the best use for collected rainwater is watering container gardens, collecting water for rain gardens or small ponds, or watering small areas of gardens with soaker hoses designed for rain barrels. I wanted to collect rainwater for household uses as well. To do this, we’ve set up eight food-safe 55 gallon drums in the basement of our house, with no modifications to the drums. To fill one of these drums we hook up enough garden hose to reach from a rain barrel to a basement drum, remove one of the bungs from the basement drum, and put the hose into the bung. We can thus use gravity to transfer water from a rain barrel into the drum. This allows us to store some of the rainwater we collect for later use. To get the water out of the basement drums, we got this hand pump, to which Mike attached enough PVC pipe to the inlet end to reach from an open bung hole to the bottom of the drum. He also attached PVC pipe to the outlet end so we can pump the water into a bucket or a watering can. The set-up is shown in the photo below. When the drum is emptied, we move the pump to a full drum and refill the empty drum from one of the rain barrels. We carry the water we pump out to where we need it.

When we still had a toilet with a 3.5 gallon flush, we used some of the rainwater we collected to flush the toilet. Now that we have a 1.6 gallon flush toilet I prefer not to splash blackwater out of the toilet as was inevitable when we bucket-flushed the toilet. These days the primary use for the rainwater in the basement drums is for drinking water, along with watering houseplants and started seedlings during the winter months. We filter the rainwater with this filter with four ceramic filter elements installed and drink the filtered water. We can and sometimes do use it for cooking as well. I like the taste of the filtered rainwater better than that of our municipal water, which is drawn from the Missouri, Meramec, and Mississippi Rivers and requires considerable treatment before it can be drunk. While I can’t speak specifically about health issues, I feel quite confident of the fitness of the filtered rainwater for drinking in spite of the asphalt-shingled roof (although when it next needs replacement, we’ll replace it with an enameled metal roof, the preferred choice for rainwater collection). The rain doesn’t have much contact time with the shingles and the roof was already in service for eight years before we collected water from it, so I suspect most of the volatile compounds of concern had already leached out of the shingles. The ceramic filters will filter out bacteria, which I suspect is the major concern with water collected off a roof. They will last for many years with occasional cleaning. However, I urge anyone who wants to drink collected rainwater to educate yourself thoroughly and consider your own circumstances, which may differ from mine. What I’ve said is for informational purposes only!

At any one time the barrels underneath the house downspouts can hold up to 300 gallons of water. That’s not enough stored water to carry the container plants through a several week long drought, much less the other plantings in the quarter acre of ground downhill of the barrels. The vegetable gardens are uphill of the house barrels so they cannot be watered from them except by hand-carrying water. After we got our garden shed last winter, which sits at about the same level as the vegetable garden, we set up a system to collect rainwater from the shed roof in a 500 gallon low-profile water tank which then can water the vegetable garden by gravity feed. The pictures below show the tank in back of the shed and details of how Mike hung the gutters and downspout.

The shed had an enameled metal roof as an option so we chose it over a shingled roof. Rather than attaching metal hangers to the shed and hanging the gutters from them, Mike made platforms from scrap wood, attached them to the sides of the shed, and screwed the bottom of the gutters to the platforms. We’ll have to see how long the platforms hold up to environmental conditions. Looking at the third and fourth photos you can see that the gutters on the sides of the sheds do not have end pieces attached. Instead they empty into the gutter on the rear of the shed. That gutter has a flexible downspout attached to it and to a provided opening at the top of the tank. The tank came with a leaf screen which is under the downspout opening. The tank has two openings on the side, one near the bottom and one near the top. Mike used PVC pipe to attach a hose bib to the bottom opening, as seen in the photo below. I attached a two-way hose valve to the hose bib. One side has a short length of hose on it, for measuring the level of water in the tank and for filling a watering can. I can attach garden and soaker hose to the other side for watering the vegetable garden.


The top opening on the tank is for overflow. The first of the shed photos shows the entire overflow system (the PVC piping on the right of the tank). The photo below shows in detail how the PVC pipe attaches to the overflow opening. Later this fall I plan to put in a rain garden to be fed from the overflow. The tank sits directly on level ground and I will put the rain garden slightly downhill of the tank so the overflow water leads away from the tank.

With a one inch rainfall falling onto the 120 square foot shed roof 75 gallons of rainwater can be collected. Since the tank holds 500 gallons it takes close to 7 inches of rain to fill the tank. We haven’t had that much rain since we finished the collection system around the beginning of July. Right now, including the half inch of rain we received today, the tank holds about 300 gallons of water. That’s as much as is held by all the other rain barrels put together. For the past week I’ve been watering the container plants from the tank in back of the shed, as I had emptied the rain barrels onto part of a perennial border, into the rain garden since it had not rained in a month, and onto the container plants and spring-planted trees and shrubs. The new tank has already proven its worth. I expect to use it more during the remainder of the growing season and am thinking about how to make it more useful for watering the vegetable garden next year.

With the downspout attached directly to the 500 gallon tank I am concerned about freezing of the water in the tank or in the downspout over the winter. What I expect to do is disconnect the downspout and add a piece of downspout to it sufficient to reach the ground, as well as drain the tank. When spring comes it will be a simple matter to close the hose bib, clean the leaf screen, and reattach the downspout.

In the long run, I’d like to have more water stored in tanks or ponds at vegetable-garden level, as 500 gallons won’t go far in a drought like we had last year. Also when the rain barrels at the house need to be replaced, we’d like to replace them with higher-capacity tanks or linked barrels and have more rain gardens or berms to hold overflow water. But this isn’t bad for a start.

Tuesday, July 30, 2013

Computing the Living Low Way

I like to include a picture of one of my gardens even when it has nothing to do with the post. This is the herb garden on July 26, at the height of summer.

Sometimes I feel really ancient, although I’m actually still middle-aged. Contemplating the evolution of computer technology can produce that feeling. In high school in the mid 1970s, the only computer classes offered were Fortran and Cobol programming courses. Computer class consisted of learning the programming language, figuring out routines to solve the problems given, creating a deck of punched cards with each step of the routine on a different card, and waiting for the computer operators to run the deck through the computer to learn if the routine was correct. The high school would run just one set of punched cards each day. In spring 1979 when I was in my last semester of college, the college computer lab finally received terminals for inputting programs into its mainframe computer. When I attended grad school in the first half of the 1980s our lab had a PDP-11 minicomputer that was interfaced with the experimental apparatus and controlled an X-Y recorder to capture the raw data, but I had to do a lot of data analysis on the raw data by hand. My PhD thesis was typed on a typewriter as existing personal computers were not up to that level of word processing.

The only personal computers I saw before 1984 were a Sinclair ZX-80 that my first husband owned and a Commodore 64 that a friend of ours owned. These were no more than toys in my opinion. It wasn’t until the Macintosh computer came along, with its ability to run office software and print out documents, that I saw any utility in personal computers. The company I worked for had one of the first Macs in its computer lab, where I used it to write articles for the newsletter I edited for the local chemical society. By the end of 1987 I’d set aside enough money to pay cash for a new Mac SE and a printer. I’ve had a computer at home since then.

You may be thinking that in 25 years of home computing I must have gone through a lot of computers. Not so. In all that time Mike and I have had only four different computers. Of those we still have two of them: the Mac SE, which I still use, and the computer I’m writing this post on. In this post I’ll discuss how we have resisted the trend to buy new computers every few years and avoided becoming too dependent on computers.

I suspect that many, if not most, of us who use a computer at home don’t need the best computer now available do do things like browse websites, use most software marketed for the home or small business use, manage online banking or use home accounting software, or use the computer for entertainment as long as you don’t insist on playing the latest computer games or having the fastest downloads possible. Computing on the cheap is another good skill to develop for those of us who are living low by choice or chance.

To apply the Living Low Way to computing, consider what you need either or both of a computer and Internet access for versus what you want them for. Do you need to receive and respond to email from your employer at home, or do you have a home-based business? In those cases you need both but maybe not the latest and greatest computer or the fastest Internet access depending on what you are doing. Do you have students at home who need either or both for their schoolwork? If they have certain websites they must access for their studies then whatever computer they use must be able to access those websites.  Again, however, they may not need the newest and fastest computer for their studies. Are you using the computer and/or Internet for personal purposes such as managing your finances, using office software for home purposes, pursuing hobbies, sending and receiving email, and/or uploading or downloading music, photos, or videos? I suggest that for people in this situation, the older the computer and the slower the Internet connection that you can live with, the better off you are. In fact, you might want to consider whether you really need either or both at home. Don’t forget that widespread home computers and Internet access are recent phenomena, not older than 15 years or so in the US. You, and I, can do fine without a computer at home. Now is a good time to consider backup ways to accomplish tasks that you currently do with a computer in case you find yourself unwilling or unable to spend the money to keep a working computer or Internet access at your residence.

The key to low cost home computing is being willing to keep a computer for much longer than upgrades for the operating system are available. My Mac SE is a case in point. Its operating system (System 6) is over 20 years old. Any browser that would work for it would be so primitive and slow that it’s pointless to connect the computer to the Internet. However, the computer itself runs as well as it did when I bought it, and the software is still as useful for the same purposes as the day it was installed. While I no longer have the original printer, the inkjet printer I bought for it over 20 years ago also still works and I can still get ink cartridges for it.

When Mac’s System 7 OS came out I didn’t rush to install it as I had with Systems 5 and 6. The SE, though only a few years old, did not work well with System 7. It was then that I learned a valuable lesson: trying to keep up with the computer Joneses is a fool’s game. Any new computer will become obsolete, in the sense of not running the latest version of its software maker’s operating system, within just a few years of its purchase, long before the computer itself quits running -- at least, if the computer was well made. But even though obsolete the SE was capable of interacting with other computers through the 1990s via documents on floppy disks that the more-recent computers at the office of the nonprofit I volunteered for could read. I continued to use all the same programs. For 13 years that SE was the only computer we owned, and it did everything we wanted it to do.

During these years the Internet and personal email accounts went from almost nonexistent to a big deal. I had no need of either at home because I could do both when I volunteered at the nonprofit’s office, using its computers. However, when I left that organization in 2001, I no longer had that option. At that time a friend of ours no longer needed or wanted the notebook computer he’d had to purchase for his studies. We bought it from him. It was an IBM PC running Windows 95, already behind the times, but that made the purchase price low. We economized on hardware by purchasing a used inkjet printer. I downloaded free office software for the computer. My mom had a scanner that didn’t work on her current computer so she gave it to us. With a 56K modem and dialup Internet service we had a computer that was capable of sending and receiving email as well as browsing the Internet. That computer worked for us for 5 years. While I moved office software use to the PC I didn’t bother buying software for home accounting or music notation for it. The software on the Mac SE for each of these did a fine job; no sense duplicating it. We could use the money better elsewhere.

When that computer became reluctant to boot, we had to decide if we wanted another computer. Since we weren’t on a schedule we could go to the nearby public library branch to use their computers when it was open. If a friend of ours who also lives low hadn’t offered us a free Mac G3 computer that he had no more use for, we might not have replaced the PC. But the G3 came to us. We kept the dialup connection and got a 56K modem for the Mac. I traded scanners with our friend and downloaded a driver so we could use the same printer. That computer ran System 9, long surpassed but usable for simple home computing. I found a free office software package that gave us the ability do word processing and spreadsheets. I continued to use the Mac SE for home accounting and and music notation. Before long, however, the only browsers that worked for System 9 became incapable of loading an increasing number of websites. Within 2 years of acquiring that computer we were having difficulty accessing the website with our email accounts on it. Now the question became should we give up on web access at home, in which case we could continue to use the computer for office software but little else, or should we get a used Mac which could run System 10? Our living-low friend offered to assist us in purchasing and setting up such a computer, a G4 manufactured in 2001. Knowing that hardware and software for Tiger computers would not long be available (soon after we obtained the computer Apple ceased providing updates for Tiger), we bought a keyboard, DVD drive, printer/scanner, MIDI interface, and office and music notation software. Four and a half years later, this 12 year old computer is in nearly daily use, with the SE still used for home accounting. We’ve yet to encounter the website that our browsers cannot handle, but we cannot view some videos. We use DSL to access the Internet, though we could add a card to the computer that would allow for wireless access. However, since we don’t have smartphones and this is a desktop computer, wireless service offers us no benefits.

Sooner or later, however, this computer will become less useful for browsing the Internet and eventually become too frustrating for us to use it for that purpose. This time we may choose not to upgrade to another used computer as I suspect the cost will be more than we want to pay. Apple has changed chip suppliers, so for any computer running a more recent OS we’d need to get all new software and peripheral hardware. But we don’t really need Internet access at home. I can surf the web on the library’s computers, which the library has to purchase, equip, operate, protect, and fix. As a taxpayer I have paid my share toward those; might as well reap the benefits by using them. As long as the software I use to write posts for this blog can be read on the library’s computers, I can keep writing for the blog at home on this computer, uploading posts to the web on the library’s computer. Why should I spend more money to do at home what I’ve already purchased with my tax dollars?

For any of you who are considering your own situation in the light of what I’ve written, here are some questions that might help you to make a good decision on the best use of your limited time and money.

1. Could you replace Internet access at home with Internet access at your public library? This will depend on what you use the Internet for and on whether the hours the library is open mesh with your schedule. Perhaps putting data on a jump drive could replace using the Internet to transfer data between your home and a work or school computer. If you don’t need Internet access at home you might be able to use the computer you now have for more years of service than otherwise, thus saving money on Internet access fees and on the cost of computer equipment.

2. Can you do yourself or find a good serviceperson to do whatever is needed to keep your current computer running for years after its OS is no longer updated? What that entails will depend on what kind of computer you have. Microsoft has been updating its OSs longer than Apple but PCs seem to have more difficulty with viruses (so far) and also seem to be less rugged than Macs. I prefer Macs as used computers but your mileage may vary. Whatever sort of computer you choose, I suggest learning enough about it and keeping track of the OS situation so that you can add all the hardware and software you need or want to your computer before you can no longer get it in a version that works for your OS. If you don’t want to spend time doing computer maintenance, you’ll need to find someone who can help you keep your computer going as long as possible.

3. If your current computer quits working, could you replace it with a newer but still used model that will offer enough years of service to be worthwhile? This will save a lot of money over buying new equipment if you are careful to choose the right computer and OS. Do some research on the various computers and OSs available and the software versions that run on them so you can pick a combination that you can use for several more years. Low End Mac is an excellent resource for Mac users.

4. If you cannot keep your current computer going and don’t have or don’t want to spend the money to get another one, can you get access to someone else’s computer? Library computers may offer everything you really need to do on a computer if you can use them when the library is open. Some workplaces are touchy about what you do on their computers but perhaps yours isn’t, or maybe you do volunteer work that gets you free computer access and enough time to do personal computing once your volunteer duties are completed. Maybe you have relatives or friends who will let you use their computers on occasion. You could offer to pay a share of the cost of Internet access and/or of computer upgrades and maintenance.

5. Do you really need computer access in the first place? I know people who have never had and don’t want a computer. They pay bills by check and balance their checkbooks by hand, just as I did from my late teens till my early thirties. They shop in person or from paper catalogs, just as we did before we got Internet access at home in 2001. They watch videos on TV and listen to music on the radio or on stereos (we still listen to music that way). They write letters and do computations by hand, just as I did for the first 30 years of my life. Truth be told, Mike and I don’t need a computer, at home or anywhere else, and many other people don’t need one either. Should free computer and Internet access at the local library go away, we’ll go back to doing things the way we did before we had computers. But for the foreseeable future we’ll have a computer and access to Internet, and I’ll keep on blogging. Meet you here next time!

Thursday, July 18, 2013

Lessons Learned When the Lights Went Out


The herb garden on July 7.

Living here in the Midwest, we expect the occasional severe thunderstorm to roll through. Their effects depend on how much power they pack and on conditions on the ground. Our street is lined with large pin oak and silver maple trees, both of which have an annoying tendency to throw good-sized limbs during high winds. During 2004, 2005, and 2006 severe thunderstorms each summer led to loss of electrical service for us and others on our street for a day or more. In 2006 our street was in the path of two severe thunderstorms within a thirty hour period that caused at least 750,000 customers across our electric utility’s service area to lose electric service for a period of time, a few for close to two weeks. Our service was out for six days after the second storm. In 2006 we also experienced an ice storm followed by windy weather that threw overloaded tree branches on electric service lines, leading to loss of electric service for us and others in the iced area. So Mike and I have some experience with going without electricity for a few days. Still, we hadn’t been tested since the 2006 ice storm, until a tornado cut a 32 mile long path through the St. Louis metro area last May 31. Our street is a few blocks north of the tornado’s path according to the St. Louis NWS office and the tornado was not at its most intense in our area. However, tornadoes do not have sharp edges to their destruction. The winds were strong enough to drop good-sized tree limbs on yards, roofs, and electric service lines along our street. Having received warning from both the tornado sirens and the St. Louis NWS weather radio station, and hearing our community’s name listed among those in the path of the storm, Mike and I sat in the basement as the storm approached us. The lights went out, came back on again, then went out again as the winds became more intense. Around 8:25 p.m. a series of odd sounds combined with the winds. Mike wondered what they were. I guessed they might be due to the tarpaulin that shades our patio being tossed about by the wind though I was not sure I really wanted to know what the sounds were. After a few minutes the odd sounds ended and the wind noise reduced. When the weather radio, now powered by its back-up battery, confirmed that the storm was past us, we went back upstairs by the light of our flashlights. A few minutes later our neighbor knocked on the door, checking to see if we were OK. It wasn’t until he told us about the limbs that had come down in his yard that I realized that the tornado had in fact passed close to us. We lit the oil lamps in the living room and sat down to listen to KMOX-FM radio’s storm coverage on the hand-cranked radio. It wasn’t until the afternoon of June 3 that electrical service was restored to our street. At its peak about 60,000 or so of our electric utility’s customers lost service. Luckily, even though the tornado reached EF-3 intensity at spots along its path (not near us however), no one was killed or seriously injured by it, though there was considerable property damage and plenty of tree debris to be cleaned up. For us personally, other than some limbs from trees next door falling on our yard to clean up, we suffered no damage, not even to the tarpaulin. Nor were we inconvenienced in a major way by not having electric service for a few days. I thought it might be useful to discuss what works for us, and a few things we can improve on, as I suspect we and many other people will be living with intermittent or permanent loss of electrical service in the years to come. Already storms cause longer disruptions in service for more people than they used to as utilities cut costs by reducing repair crews, instead relying on calling in crews from neighboring regions in the case of widespread outages. As Sharon Astyk and John Michael Greer among others in the peak oil community have discussed, we can expect increasing unreliability in electrical service as utilities can no longer maintain service to all areas at all times. The most likely consequences include rolling blackouts during peak demand periods, shedding of the farthest-out customers, slower responses to service calls and reduced maintenance leading to more-frequent and longer loss of service, and later on service reduced to certain days or hours. In addition more people will find they lack the money to pay for electrical service as the economic effects of passing peak fossil fuel energy accumulate. Perhaps our experience and what we learned from it may help some of you become more resilient to storms (wind and economic) and reliability issues.

Cultivating a non-electric mindset

For many of us the first hurdle to handling electrical outages well is a mindset of dependence on electrical services for basic needs. For those of you who are dependent on electrically-powered machinery to maintain life, please note that I’m not talking about you! My words are directed to myself and all the rest of us for whom electricity is a convenience. Yes, refrigeration is a convenience, not a necessity, though I admit that for Mike and me it is a major convenience. But all the adjustments will become easier to make once you remember that for the vast majority of human history humans have lived and thrived everywhere, from the Arctic Circle to the hottest tropical climates, without electricity. Mike and I are old enough that some of our grandparents were born in the 1880s, before widespread electric service existed. My paternal grandfather homesteaded a property in South Dakota in the early 1900s, long before electricity made it to the area. Electricity is a recent arrival to the scene. For most of us, again excepting those who depend on electrical machinery to maintain life, we can adjust to doing without electricity. Advance preparation as well as attitude adjustment helps to make living without electricity easier and may make it cheaper as well.

During the recent outage I noticed that the use of electric generators during an electrical outage has become rather common on our street. An electrical generator can keep some useful electrical appliances such as refrigerators, fans, lights, radios, and cell phones operating during an electrical outage. However, generators come with their own costs and issues that are significant enough to make them unappealing if not prohibitive to those of us who are living low. For one thing, the generator costs money to purchase that you may not have or may have better uses for. (Mike and I can find much better uses for that money.) For another, cheap generators require gasoline to power the generator that produces the electricity, gasoline that may be unavailable or in short supply just when you need it. The unavailability could stem from the gasoline stations themselves lacking the electrical service to run the gas pumps during an outage, as happened here after the July 2006 severe thunderstorms and last fall in some of the areas affected by Hurricane Sandy. In addition, gasoline deliveries into the area may be disrupted if the storm damage is widespread enough, as it was after Sandy hit. If you can’t get gasoline for it, the generator is just dead weight. The gasoline itself costs money, of course, and more so the longer you need it. Cheap generators cannot produce sufficient wattage to run air conditioning or certain other appliances. Generators have to be located outside living quarters because burning gasoline produces carbon monoxide, a deadly poisonous gas, as well as other pollutants. They are also obnoxiously noisy. Finally, as with any other appliance, they need to be properly maintained so they will be in working order when they are needed, and gasoline to run them needs to be on hand. For all these reasons, if you and those you live with don’t need a generator to power life-support machinery, I suggest learning how to do without one. Below is how we do well without a generator, and some ways we can improve our resilience based on our experience following the tornado’s passage.

Refrigeration

The tornado hit at a time when our refrigerator/freezer was as crammed full of food as it ever is. Besides the usual leftovers, dairy products and eggs, baked goods, various fruits and vegetables, and condiments, it held several pounds of fresh strawberries (it was the height of strawberry season), 11 pints of frozen strawberries, quart jars of sauerkraut, fermented turnips, and pickled beets, and a fresh ham and other foods for a dinner party with another couple we had planned for the next day. Without a stove to cook on (our stove is electric), we had to cancel the dinner party. We did not, however, lose any of the food to spoilage. Our non-electric alternative to refrigeration is plenty of cooler space, ice to keep the cooler contents cold if the outage happens in other than winter, and neighbors to help us eat foods that won’t fit into the coolers.

I gave some of the strawberries to the neighbors since there were more on the plants to pick and we kept the eggs, cheeses, butter, some of the condiments, and the baked goods in separate coolers without ice as they did not need refrigerator temperatures to stay fresh for a few days (the condiments actually didn’t need refrigeration in the first place). Otherwise we fit everything into several large coolers and kept them iced, thus preserving all the food. While large coolers are quite expensive if you need to purchase them new, they are still cheaper than generators, especially since a cooler won’t need any further maintenance after its purchase beyond finding a place to store it. However, you may be able to trash-pick some coolers or find them in yard or estate sales or thrift shops, or you could ask for a cooler as a gift if those who give gifts to you are accepting of that, or you could purchase new ones when they come on sale. A few of our coolers have been given to us, a few were trash-picked, and we purchased a few of them new.

I am not claiming that coolers are a perfect solution to refrigeration during electric outages. Producing, distributing, storing, and selling ice all come with a substantial cost in energy and therefore pollution. It’s also true that ice may be as difficult to find as gasoline in the aftermath of a large storm. In 2006 we had to drive a half hour or more to find an open retail store with ice on hand because the area the storms affected was so large. This year we had to go less than a mile to find a convenience store with electrical service intact and plenty of ice on hand. I can imagine a situation where someone with a working generator and a supply of gasoline on hand has more success keeping food cold during a short-term electrical outage than someone relying on coolers who cannot get ice. And ice costs money. We spent about $13 on ice during the outage. Still, for those of us who want or have to live low, we’ll do better to minimize the need for refrigeration than we will to rely on a generator, with coolers and ice as a backup for short-term outages.

How can we minimize the need for refrigeration? I could have canned or dried the strawberries rather than froze them for preservation. I do have a water-bath canner but Mike and I don’t use jam and we both prefer the taste of frozen to canned strawberries. I would have dried rather than frozen the strawberries to preserve them but our food dryer relies on sun rather than electricity to dry food, and we’d not had the needed two sunny days in a row before the storm, nor did we have them while the electricity was out. We could have kept the fermented foods in a crock rather than kept them in bottles in the fridge (we could have canned the fermented foods too but we both like them better fresh). Normally we wouldn’t have had all those pickled beets in the fridge, but we’d been given a 50 pound bag of beets and didn’t want to waste them, so Mike pickled them and we were holding on to them till various friends could pick up their jars. It was our bad luck to have most of them on hand when the tornado occurred. 

Mike and I have gone camping without taking a cooler in the past, so we have minimal experience at living without refrigeration. On those trips we’ve taken foods such as pasta, vegetables, fruits, cheeses, and baked goods that don’t need refrigeration, and cooked only as much as we could eat at each meal. Imagining life without refrigeration, we’d keep our fermented foods in the crock and take out only what we need to eat at each meal, cook smaller amounts more often to avoid leftovers during the warm months, dry or can the foods that I now freeze, rearrange the garden to avoid gluts of perishable food to the extent possible, and use natural refrigeration in the winter (coolers kept in the root cellar). Perhaps ice boxes and ice storage and delivery would make a comeback if electricity became unreliable enough for enough people. It wouldn’t be as convenient as having refrigeration, but it could be done.

Cooking

As I mentioned, we have an electric stove and an electric oven. We also have a number of different non-electric means of cooking, such as a two-burner camp stove, a larger stove that can heat a stock pot, a Weber kettle, a hibachi, and a fire pit in the back yard. The first two require bottled propane, which we have on hand; the next two use charcoal which we also keep on hand; and the third burns wood. We have a solar oven as well. Of all these means to cook the one we used during the outage was the hibachi. We had a lot of leftovers to eat and we chose to eat those cold rather than do much cooking. I think the only cooking Mike did was for breakfast since we nearly always eat eggs and drink coffee and tea then. If it had been sunny we might have used the solar oven to reheat leftovers, but it wasn’t sunny enough for that. If we’d had a means to roast the ham we could have had our friends over for dinner since we could have cooked the corn on one of the propane stoves, but without a way to roast the ham we and our friends agreed it was better to postpone dinner. Our wood pile is uncovered and May brought us an excess of rain, so the wood we had on hand was too wet to burn.

One thing we learned from this experience was that a larger charcoal grill could provide us with more cooking options during an electrical outage. Since then we have bought a larger grill that has room for a 13x9 inch baking pan under half of the grill surface. A week or so later Mike successfully roasted the ham by putting it above the 13x9 pan and placing the charcoal in a basket next to the 13x9 pan, so the ham roasted in the indirect heat. It worked so well that he’s repeated the technique with roasting chickens, to rave reviews. Mike reuses charcoal pieces that did not completely burn so a large bag of charcoal lasts a long time. We also realized we need to build a proper woodshed so that we have dry wood for building cooking fires, and we should have on hand a large number of matches as well as Mike’s refillable lighter and the non-electric fire-starting kits that we keep with our camping supplies. Finally, a sturdy awning roof extending out from the north side of the house would provide a larger, shadier space for cooking and living outside that would be useful if we had no electric service for extended periods of time. We have this planned for next year.

Communications

We have a landline with four old-fashioned corded telephones as I discussed in this post. The phone company’s lines power our phones and since the phone lines stayed operational, our phones did as well. For those of us who live low I think this is the best arrangement, though a living-low friend of ours posted a comment about the Magic Jack phone system. That requires a computer as I understand it; see the discussion of computers below for why we stick to the landline. However those of you who plan to keep an operational computer during electric outages might look into it.

Since I wrote that post we were given a small cell phone for which we buy $10 worth of minutes every 90 days. We only use the phone when we are away from home and only turn it on if we need to make a call. If we used it at all during the outage it was only briefly so we did not need to concern ourselves with keeping it charged. If one of the reasons you want a generator is to power your cell phone, consider one of the hand-crank radios that includes provisions for charging small electronics to see if it would suffice to charge your phone. You can find one such radio here; there are most likely others but I haven’t researched it since we don’t need one.

Speaking of radios, as I mentioned we have a tiny, very cheap hand-cranked radio that includes AM, FM, and weather bands. We’ve found this sufficient for our needs, and the weather band provides backup for our larger weather radio (the larger radio has a battery backup but if I leave it on the 9 volt battery drains rapidly, and I often forget to turn it off when the electric service goes out). Retail outlets such as Lehmans carry a number of hand-cranked radio options. If our hand-cranked radio quits working we’ll purchase another one as I think it’s a good idea to be able to hear radio announcements in emergencies.

I suppose you could call television a form of communication, though I don’t care for what it is communicating. In fact we dislike it enough that we don’t have any televisions. Clearly we didn’t miss it since we don’t have it in the first place.

The computer I’m writing this on is a twelve year old desktop computer and we don’t have wireless service, thus we had no computer or internet access during the outage. For those few days it was easy to be without it. Since we had a working radio we had access to any official communications that would need to be made, and we didn’t need to know anything else that passes for news. If we’d wanted to access the internet badly enough we could have gone to any library branch to use their computers. The library computers are our backup strategy for both internet access and general computer use, and not just during an electrical outage. We envision the day, perhaps not too many years from now, that we no longer have internet access, either because our ancient computer’s browser can’t read enough web sites to make internet access useful or because we no longer have a working computer at home. I’ll explain more about this in a future post. For those of you who want to keep a laptop computer battery charged during an electrical outage, it might be worth researching solar or hand-crank charging options.

Music

We must be among the few baby boomers who still have and use the stereo system that we purchased in the 1980s. It requires electricity and thus is unavailable to us when we don’t have electrical service. We don’t consider that a problem, as we both play multiple non-electric musical instruments and can entertain ourselves musically any time we wish. We are also about the only two people in the US who don’t have an eye-device for listening to downloaded tunes. If we want to listen to music on the radio, the hand-cranked radio works for that.

Laundry

In this post I discussed our system for hand-washing and line-drying clothes. If the electric outage had continued for a few more days I might have hand-washed a load of clothes. But we have enough clothes that we could have gone another week or two before either of us would have needed to wash something to have enough clean clothes to be decent. For as long as clothes are cheap this will work for us and other people. But I’m glad to have the non-electric options for the day when clothing becomes more expensive and harder to get, if that should happen during my lifetime, or if electric service becomes unreliable and/or too expensive.

Heating and cooling

Neither of these was an issue during this outage as temperatures were in the range when we use neither heat nor air conditioning. In this post I offer suggestions on living without air conditioning, many of which work without electricity. If it were hot enough, we’d spend more time in the basement or in a shady place outside if we didn’t have electricity for air conditioning or fan use. At this time our non-electric backups for heating are extra blankets and a kerosene heater with a few gallons of kerosene kept on hand. The kerosene heater would get us through a short-term electrical outage during heating season. Later this year we plan to shop for and have installed a wood stove, as this would provide us with a non-electric means to both heat and cook during cold weather.

Lighting

We both have multiple flashlights of different sizes and brightnesses. The flashlight I used the most during this outage was a hand-crank LED flashlight that is old enough that one of the LEDs burned out. It’s not my favorite flashlight but it has lasted for several years (good thing as the battery is not user-serviceable). I prefer the metal flashlight that uses two AA batteries, for which I obtained an LED replacement bulb some years ago. The light is really bright and the flashlight itself is very sturdy. But it wasn’t working when the tornado happened. I thought the LED bulb had died, but as it turned out corrosion on the interior of the flashlight had caused electrical problems. I wish I’d asked Mike to check it out before we’d ordered a replacement LED bulb. He cleaned off the corrosion and now the flashlight works again, to my delight. On the other hand, I do have the replacement bulb if it’s ever needed. Of course, this flashlight and others like it that we both have require batteries; that’s fine as long as batteries are easy to get, not good otherwise.

For larger-scale lighting we have the two oil lamps that I mentioned above in the living room, plus several more oil lamps that could be put into service if an electrical outage went long enough or electric service becomes unreliable. We keep some lamp oil on hand, more than enough for a short-term outage. As long as lamp oil is available, we could use these for enough lighting for cooking and such tasks, but our lamps aren’t bright enough to read by. So far we haven’t been without electric service long enough in the winter to want brighter light for reading after sunset, but that’s something we need to consider when electric service reliability becomes more of an issue for us than it is now. I don’t think either of us would be happy to spend several hours each winter evening without being able to read. (No, we don’t have e-readers, and neither of us wants one.)

We also have a camping lantern that is solar-powered. For anyone who doesn’t want to fuss with oil lamps, these are good choices for emergency lighting, so long as the battery is kept charged up. Our lantern hangs from a post in the bathroom, which is quite bright since it has an east-facing window. The lantern stays reasonably well charged and we used it to light the bathroom during the outage, but it might be better if we remembered to put the lantern outside in brighter sunlight on occasion. As a long-term light source I don’t think I’d want to rely on a camping lantern. Batteries don’t last forever, and neither do the compact fluorescent bulbs that ours uses or the LEDs that newer ones use. I think lamp oil and wicks will be available for longer than spare batteries and bulbs for electric lanterns, but I could be wrong about that.

We have candles but did not use them. I tend to think of candles as more of a mood light than a working light. But it might be that farther down the decline curve, beeswax candles take on a bigger role. Beeswax is a renewable energy source that eventually may be more widely available than lamp oil from petroleum (vegetable oils will be needed for cooking). During my lifetime, however, I’m guessing that oil lamps will be a better choice for emergency lighting than candles.

Tuesday, July 2, 2013

Garden update: catching up after a late start

The photo above shows the greens bed on June 15. The yellow flowers are growing from the bolting bok choy plants. In front of the bok choy is the lettuce crop, in back are the cabbage and broccoli crops. To the right of the greens bed is the bed with beets and carrots; to the left is a bed with peppers, tomatoes, eggplants, tomatillos, ground cherries, basil, and two types of annual flowers, cosmos and zinnias.

During the weeks since my last post, I have been adding the rest of this year’s crops to the vegetable garden, harvesting various crops, and keeping up with the lawn mowing. Now that summer crop planting is nearly completed and since it is raining yet again, I have time to offer my first update on the scientific dialogue that my garden and I are engaged in.

It’s rained a lot so far in 2013. According to the St. Louis NWS office, we’ve already received 30 inches of rain this year; compare that to the normal yearly rainfall of 40 inches which is rather evenly spread throughout the year to get a sense of how wet it has been. At our location I measured 7.1 inches of rain during April, 7.9 inches in May, and 5.7 inches of rain in June, a marked contrast to last year when we received almost no rain after the first week of May through the end of July. April 2013 was also cooler than normal, with our last frost occurring on April 20, while May was somewhat warmer than normal and June was near normal for temperatures. The only significant storm we have experienced so far this year was the close approach of the May 31 tornado that travelled about 32 miles across the St. Louis metro area. Near its end it passed a few blocks south of us at EF0 intensity. There was little if any hail associated with the tornado and thus no effect to the vegetable garden, but we experienced strong winds that threw tree limbs from neighboring trees on our yard. We lost electrical service for a few days but had no structural damage from the tornado. I’ll post about that experience sometime in the next few weeks as it is relevant to the larger purpose of my blog.

The combination of heavy rain and cool temperatures kept me out of the vegetable garden during most of April, a time when I should be planting all of the cool weather crops for the best yields. This year I planted the peas at close to the right time, April 5, but I did not plant the onion seedlings until April 24, the potatoes until April 30 and May 1, and the bed with cool-season greens such as lettuce, cabbage, and broccoli until May 12 and 13. It was May 17 before I planted seeds of parsnips, beets, and carrots. In all cases except for the peas this was well past when Missouri Extension recommends planting the crop, although I have planted on similar dates some past years.  The warmer weather since mid-May has been more favorable for garden work and I have planted warm-season crops like peppers, tomatoes, sweet potatoes, dry beans, cowpeas, and flint corn since then. I still have squashes, melons, and cucumbers to plant since I have found that the Missouri Organic Association’s recommendation to plant them in late June to early July to reduce squash bug damage works well for me.

The potato bed was the first bed I prepared and planted after receiving the report on soil sampling and preparing the fertilizer recipe for 2013. Since then each bed has received the recipe, modified to fit whatever phosphorus source I could buy locally or order on-line once the hard rock phosphate bag I had on hand emptied. The pea and onion beds were planted using the recipe from earlier years that was not matched to soil test results.

So far I have harvested all the spring lettuce, bok choy, and potato onions and garlic and nearly all of the peas. Because I did not pre-sprout the pea seeds and the soil at the time I planted them was quite cold, most of the seeds rotted. I should know by now that there is no point to my wasting pea seed on the garden unless I pre-sprout it before I plant it. Even with the poor germination, however, I still got about 3.3 pounds of garden peas from an area of 32 square feet, which translates to a yield of about 10 pounds per 100 square feet, not far below my best yield of 17 pounds per 100 square feet. Improving my pea-growing technique should result in improved yields even without fertilizing to remedy deficiencies on soil test results.

Since the area where the lettuces and bok choy were planted received the 2013 fertilizer recipe and the effects of using that recipe are part of this year’s scientific dialogue, I was especially interested in noticing any effects on lettuce yield and taste. Of the three varieties I grew this year, the winner for both taste and yield was ‘Anuenue’, the round green lettuce in the photo at the top of the page. It yielded at an adjusted level of 113 pounds per 100 square feet, slightly better than the previous best for any variety of lettuce I grow, and it set a solid head with a delicious taste and no bitterness at all, not even when it bolted! Neither ‘Bronze Arrow’ nor ‘Pirat’ tasted any better than usual and their adjusted yields were about half that of ‘Anuenue’. The bok choy yielded at 121 pounds per 100 square feet, not a high yield for a spring crop. All of it was bolting by the time I picked it, perhaps because the cool conditions in April primed it to bolt early. It tasted about the same as usual but it seemed to be less bothered than usual by the green caterpillars that feed on the cabbage-family crops. (The cabbage and broccoli also seem to be less bothered with the same insect pests this year.)

Of the root crops, the parsnip seeds showed very low germination. Because I have only grown this crop one other year, I did not remember that parsnip seeds require cool soil for good germination. Next year I plan to change how I grow it and the onions and leeks I grow from seed: I’ll add the parsnips to the bed that includes onions and leeks and direct-seed all three crops, ideally sometime between March 15 and April 10, rather than attempt to grow the onion and leek seeds in flats and then transplant the seedlings. This year the onion and leek seeds did not germinate well, perhaps because the porch was too cold during that time. I think direct-seeding and thinning the onions and leeks may result in a better stand and not take much if any more time than it did to transplant tiny onion and leek seedlings, and the parsnip seeds should germinate much better in the cooler soil at that time of year.

For those of you who are not familiar with potato onions, these are in the same genus and species as bulb onions but the bulbs divide underground into a cluster of bulbs as do shallots. The potato onions I grow look and taste like yellow bulb onions. Single bulbs of varying sizes are fall-planted and mulched after the ground freezes to prevent frost heaving. I use leaves to mulch my crop. In early to mid March when the ground thaws for the final time the mulch is removed so the bulbs can grow on. They are harvested when the tops die back around mid-June. This year I harvested them on June 18 for a yield of about 33 pounds per 100 square feet, about half of the best yield I’ve obtained from these onions. The better yield came in a year when I planted them 6 inches apart rather than 8 inches apart as I did last year. Last fall when I planted the crop I did not add any additional fertilization beyond what the previous dry bean crop received when I planted it. This year I will again plant the potato onions (and the garlic) in fall after the dry beans are harvested, but I may re-fertilize before planting the onions and I’ll plant them at 6 inches apart. In the long term I’d prefer to plant only these onions and not the bulb onions because the potato onions are much easier to work with. The yield of the potato onions in the best year has been higher than the best bulb onion yield, but it has taken me several years to learn from experience the need for the winter mulch and for its prompt removal in early spring in order to keep the potato onions alive during winter and allow them to grow on in spring. Once I am sure I know how to grow the potato onions well I will stop growing bulb onions and try to grow enough potato onions to satisfy our appetite for onions.

Of the fruits, I had a tied-for-best yield of strawberries: 40 pounds from the 100 square foot bed of them. This bed hasn’t been fertilized since I planted it in 2011 with two different varieties of strawberries, ‘TriStar’, an everbearer, and ‘EarliGlow’, a May bearer. We had so many strawberries that I was able to preserve some of the crop for later use for the first time. Later this summer I plan to renovate the bed by removing excess plants and weeds and adding the 2013 fertilizer recipe to the surface of the bed. By now I think most of the plants are ‘EarliGlow’, the flavor of which I prefer, so my goal will be to end up with one plant per square foot of all ‘EarliGlow’ strawberries in the renovated bed. I’m glad we had so many strawberries this year because the birds ate nearly all of the plums and are eating a lot of the blueberries before they ripen (I’ll try netting the blueberries later this week as some of the bushes still have most of the so-far unripe crop on them). I did harvest a little over a pound of serviceberries before the robins moved in one afternoon and stripped the two plants nearly bare. Later this summer we expect to harvest pears, apples, and persimmons, perhaps even a couple of pawpaws. I hope to harvest some hazelnuts and chestnuts as well if the squirrels decide to share them with us.


The photo above was taken on June 15. In the middle are the ‘German Butterball’ potatoes. The bed on the left has ‘Elba’ potatoes in back and sweet potatoes in front. These two high-calorie crops are a mainstay of the Ecology Action approach to growing high yields of foods in small spaces. This year I want to see if I can beat the best yields I’ve gotten so far for these two crops. The sweet potato slips were planted on May 29, at the right time according to Missouri Extension. Both crops look good so far. To the right is another view of the bed containing tomatoes and the other crops mentioned at the top of the post. This bed was planted on May 21 and 22 and so far all the plants are growing well. This year’s wet conditions are conducive to the disease that has attacked my pepper plants in past wet years, but it’s too early to tell if this year’s plants will be spared. So far they look good and have set peppers. The dry bean, peanut, cowpea, and flint corn crops were all planted in June and look about the way I would expect them to at this point.

It’s been a good start to the garden year with more to report later on as the summer crops start bearing. In the meantime, after the squash, melon, and cucumber seeds have planted, I will have other topics to write about. I’ll meet you here again after awhile!