

With so little rain recently, and with August ending with a few days of record highs, for the first time this gardening season I have had to resort to substantial amounts of irrigation to keep the vegetable garden productive. I haven’t needed to irrigate to the degree of last year as our area is not in drought according to the U. S. Drought Monitor, though it is categorized as Abnormally Dry. With the area rivers at reasonable levels for late summer, I haven’t hesitated to use municipal water derived from those rivers for irrigating the vegetable garden. But we do have a backup system for collecting and using rainwater off the roofs of our house and garden shed. This seems like a good time to discuss that system and the uses to which we put the stored water.
Our house was built in two sections with separate roofs. The larger roof slopes are on the main portion of the house. Since the total area of this part of the house is about 800 square feet, each roof slope collects the amount of rain that falls on a 400 square foot area and directs that into a downspout. The other portion of the house, a later extension, is about 300 square feet in area, thus each roof slope for that portion collects rain for a 150 square foot area. The average yearly rainfall in St. Louis is about 40 inches. If we could collect every drop of rain falling on the entire house in a year, that would amount to about 3667 cubic feet of water. At about 7.5 gallons of water to a cubic foot, we could collect about 27,500 gallons of water off the house roof in a year. That would be an average of 75 gallons of water a day. When I’m not irrigating the garden, Mike and I use about 30 to 40 gallons of water a day (total, not per person). In theory, rainwater collection could provide all of our needs and at least some of the garden irrigation ... but we’d have to have a place to hold the water between rains. A five foot high tank in the basement would need to have a footprint of 733 square feet to hold the entirety of the yearly rainfall, taking up nearly the entire area of the basement! In practice, however, the tank would need to hold only about enough water to go the longest stretch between rains that we normally experience. 2012 could be considered a benchmark year in that we went about three months with very little rain. If we assume we need to hold only about 1/4 of our yearly rainfall in a tank at any one time, the size requirement drops to about 1/4 of the square feet in our basement for a 5 foot tall tank that will hold close to 7000 gallons of water. That’s still a much larger tank than we want to have (or pay for having put in). I suspect we could get by with less capacity than that and obtain most of our household water from collected rainwater but thinking more deeply about that is not on the menu for this post.
Our current set-up cannot store anywhere near 7000 gallons of water. But we find it useful nonetheless, and it will be a real blessing if at any time we have a short-term disruption in municipal water service. Such a disruption could be as simple as a boil order due to a broken pipe or short-term problem at a water plant. Our water filter allows us to filter and drink or cook with the rainwater we collect, thus we will not need to buy bottled water or boil municipal water during a boil order. If for some reason the water utility could not pump water for hours or days (an electrical outage, an earthquake, or who knows what else), we will also have water for bathing and cleaning as well as to water container plants or selected garden plants. In order to go weeks or longer without municipal water, we’d need more holding capacity than we now have for household water, and we’d need more collected water closer to the vegetable gardens. While I’ve giving that eventuality some thought, for the time being our system satisfies our needs.
To collect water off the roof slopes, we use rain barrels. In our case the barrels consist of 55 gallon plastic drums that we obtained free or at $2 per barrel from a number of local sources 10 to 15 years ago, before rain barrels became popular enough that companies with excess barrels realized they had a revenue source on their hands. Even so, when I last purchased non-food-safe 55 gallon drums two or three years ago, we paid only $10 per barrel. That’s a lot less than the fancy rain barrel systems in the gardening catalogs. If you want to make your own rain barrel, check to see who might have used 55 gallon drums available. Soft drink bottlers, processed food manufacturers, and cleaning-product manufacturers or distributors are all possible sources of free or low cost used 55 gallon drums, and there are probably others I haven’t thought of. Food-safe drums are preferable if you can get them, especially for longer-term storage of water you’d like to drink or cook with. Put “rain barrels” into a search engine to find instructions on making your own barrels. The River des Peres Watershed Coalition in the St. Louis area has instructions available here.
If you want to collect or store rainwater in larger amounts than a daisy-chained array of 55 gallon drums offers, put “water tanks” into a search engine. That’s how we found the low-profile 500 gallon water tank we purchased. Farm and rural supply stores also carry large tanks you could use for rainwater collection. I suggest looking at the offerings from a number of retailers in light of careful consideration of your own needs and goals for rainwater storage. That said, you can’t beat a free or cheap used 55 gallon plastic drum with a hose bib plumbed near the bottom of the drum, stuck under a downspout. You’ll soon get a feel for how much water you can collect and determine if that’s sufficient or if you’d like to expand the system.
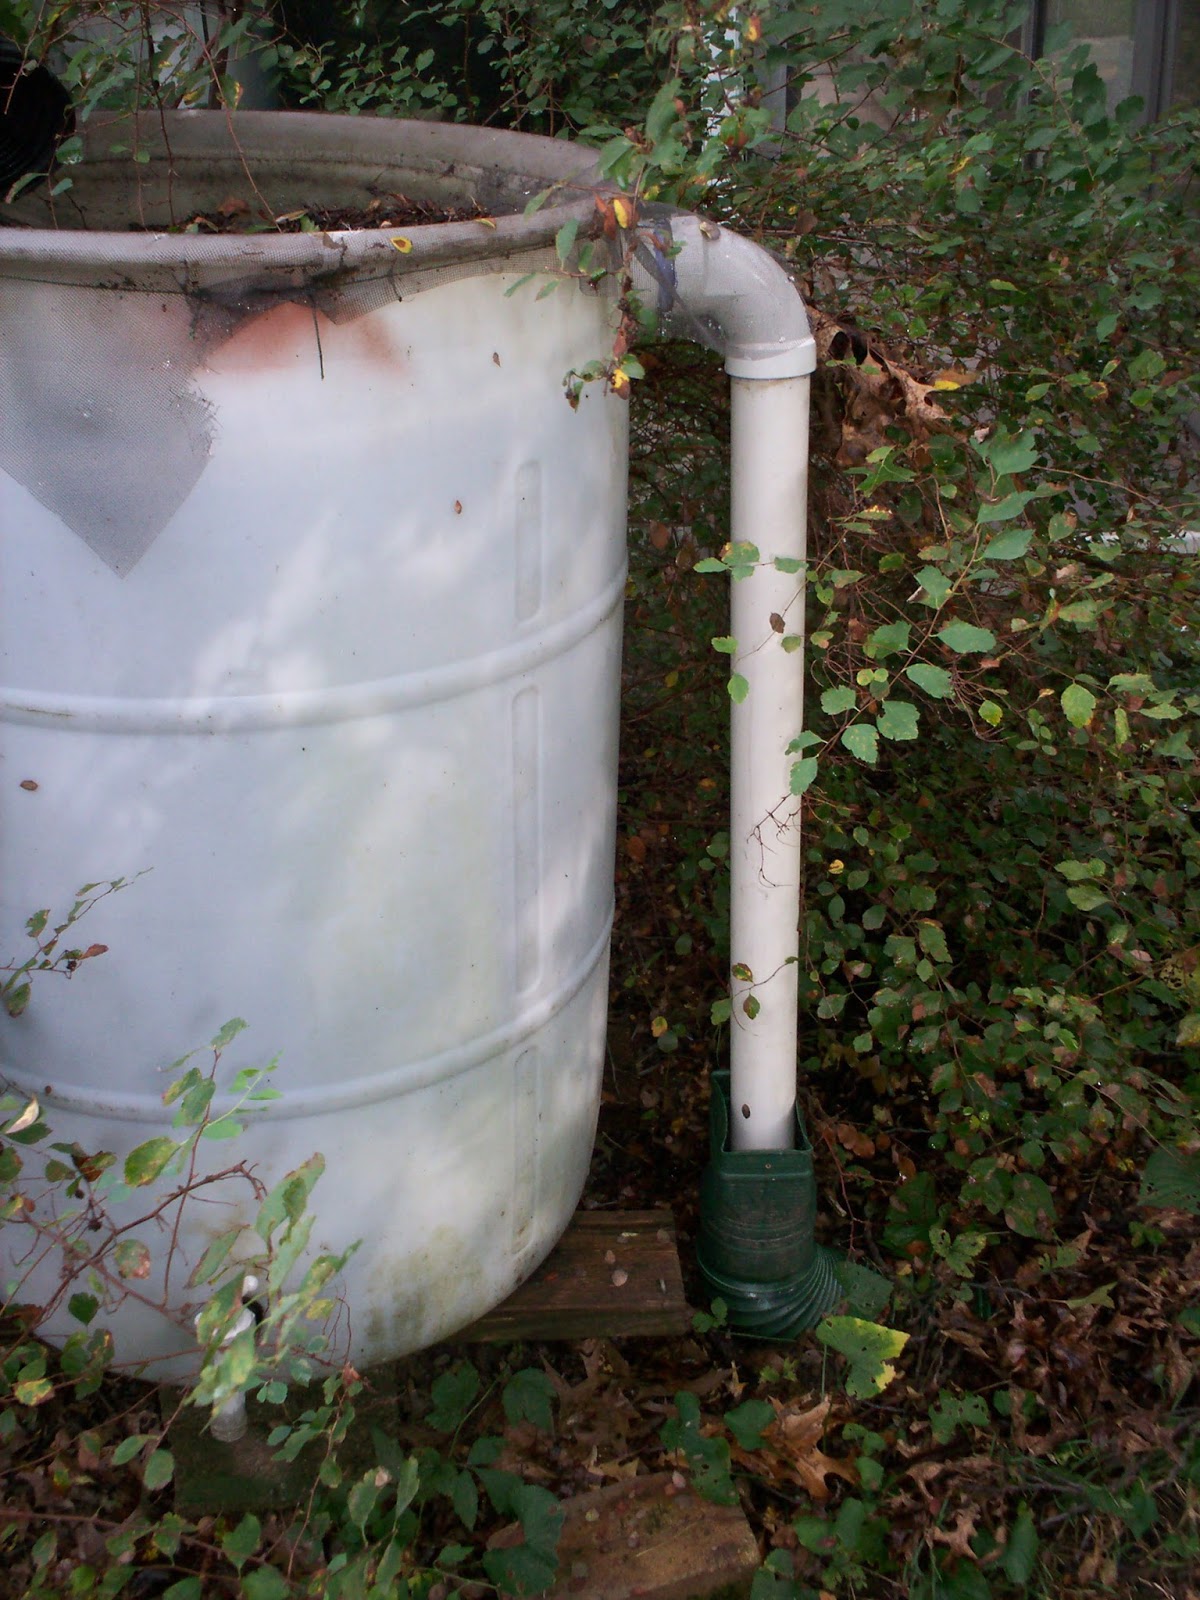
Below is a photo of one of the single rain barrels under a downspout off the smaller of the two roofs of our house.

Choosing where to plumb the hose bib into the barrel depends on how you want to get the water out of the barrel and on whether the barrel sits on the ground or on a stand. Many of the rain barrels in garden catalogs sit directly on the ground and are intended to be emptied into a watering can. Watering cans might stand a foot tall, so the hose bib has to be high enough to allow a watering can to fit under it. A 55 gallon drum is about 3 feet tall. If the hose bib is a foot up the side, that means that 1/3 of the barrel’s capacity is unavailable for your use. To maximize the amount of water available from a rain barrel, put it on a stand and put the hose bib as close to the bottom of the barrel as is practical. Our barrel sits on two concrete blocks. The hose bib is about 2.5 inches up from the bottom of the barrel. My 10 inch tall watering can easily fits under the hose bib. I can also attach a garden hose to the hose bib to lead the water to other parts of the garden, as long as where I want the water to go is at the same level or lower than the hose bib.
To put the hose bib on, Mike removed half of the top of the barrel so he could reach inside it to place a bulkhead fitting where he wanted the hose bib to attach, rather than using a tapper and screwing the end of the hose bib into the tapped hole as many build-it-yourself rain barrel publications suggest. The bulkhead fitting is less likely to leak, but the tapping method is easier as it does not require removing part of the top of the barrel. The downspout needs to be shortened so the rain barrel fits under it. Because we have a half-open top, we allow the water to come out of the shortened downspout and drop into the barrel through window screening fastened to the top of the barrel. The window screening keeps leaves and twigs out of the barrel and prevents mosquitoes that might hatch in water sitting in the barrel from getting out, as long as I remember to draw the water level down below the screen after rain fills the barrel and mosquitoes lay their eggs in the water while it is above the screen.
We have linked together two 55 gallon drums, with the linkage near the bottom of the tanks, and placed the linked barrels under the downspouts on the main (larger) portion of the house. Otherwise the set-up is the same as for the single barrel. When we made our linked barrels we were concerned that heavy rain could dump water into the barrels at a high enough rate to warrant using 2 inch black flexible hose clamped onto similar sized PVC pieces attached to appropriately sized bulkhead fittings in both barrels for our linkage system. The River des Peres Watershed Association suggests a much easier way to link two barrels together: run a piece of garden hose with two female ends between the hose bibs of two barrels and open the hose bibs. Then both barrels will fill from the bottom up even though the downspout empties into only one barrel. With a hose manifold one could link up more than two barrels in the same way; a little net searching will yield pictures and videos of barrel manifolds. We helped a friend set up three linked barrels this way and she reports that it works well. An advantage to our set-up is that both barrels drain simultaneously, thus the rate of draining, which is proportional to the height distance between the hose bib connection and the height of the water, stays the same for a larger volume of water drained. Remember that the linkage should be at the same height as the hose bib so all barrels fill simultaneously rather than at the top of the barrels.
Freezing in the winter may be a concern depending on where you live. The River des Peres Watershed Coalition recommends removing the barrel from late fall through early spring or opening the hose bib if the barrel is left in place. I open the hose bib and allow the water to drain at the end of the gardening season (sometime in November here), either to the basement storage system or to the rain garden or elsewhere in the yard where irrigation is needed. Then I place a downspout block or a brick under the open hose bib so that water exiting the barrel dissipates its force before it hits the ground. When the temperature is above freezing the water drains out shortly after it falls. If the water doesn’t all drain out before water in the hose bib freezes, for instance when water from melting snow drains into the barrels and then freezes at night, the barrels get some ice in them. So far it hasn’t been enough ice to break the barrels, even after 15 years of exposure to sunlight and winter freezes. Leaving the barrels in place means I can replenish the basement water supply when we get a period of above-normal temperatures and rain as we often do during the winter. If you live in an area where winter is colder than it is in St. Louis, however, please consider carefully whether or not it is feasible to leave your barrels in position. You could attach flexible downspout hose to the end of the downspout during the winter to bypass the barrel, removing it in spring when you want to collect water again.
The Coalition also recommends leveling the area where the rain barrel sits, perhaps even putting down coarse gravel for drainage, and attaching an overflow hose at the top of the barrel. Only one of our four house barrels sits on level ground, the one on the patio. All the other barrels are on a slight slant despite my efforts to level them (obviously not very good efforts!). If the slant is too high the barrels will tip over before they fill, as I know from experience. Fortunately the times they have tipped over have not damaged the barrels or their fittings, and none of the barrels have tipped over for several years now. Fitting overflow hoses onto the barrels will avoid overflow eroding the ground under a barrel and will allow you to direct overflow where it will do good or at least not do harm. The photo below shows the overflow arrangement for one of our sets of linked 55 gallon barrels. PVC pipe extends about 2 inches into the barrel near the top, passes through a fitting to the outside of the barrel, and then passes through fittings to connect it to a vertical PVC pipe that terminates into a piece of flexible downspout hose that itself is connected to buried drainpipe leading to a rain garden. All overflow thus passes directly to the rain garden, where it eventually soaks into the soil. None of the other three house barrels have overflow hoses at this time; overflow runs down the side of the barrel and drops onto the ground. Eventually I will correct that situation as I would like to better use the overflow water.
How much rain can our barrels collect before overflowing? It turns out that one inch of rain falling on a 1000 square foot surface amounts to 625 gallons of water if every drop is collected. That means that our 150 square foot roof areas could collect 94 gallons of water from a one inch rainfall. In practice I have observed that a half inch of rain fills the single 55 gallon drum under the downspouts for those roof areas, in line with expectation. Each of the 400 square foot roof areas on the main part of the house could collect 250 gallons of water from a one inch rainfall. Since we have two linked 55 gallon barrels under each downspout, the linked barrels are filled by a rainfall a little under a half inch. Rainfall events of an inch or greater are not uncommon in the St. Louis area, but neither are periods of a few to several weeks with rain of an inch or less. Having more capacity under each downspout would allow me to hold more rainfall for a dry spell.
With just these barrels the best use for collected rainwater is watering container gardens, collecting water for rain gardens or small ponds, or watering small areas of gardens with soaker hoses designed for rain barrels. I wanted to collect rainwater for household uses as well. To do this, we’ve set up eight food-safe 55 gallon drums in the basement of our house, with no modifications to the drums. To fill one of these drums we hook up enough garden hose to reach from a rain barrel to a basement drum, remove one of the bungs from the basement drum, and put the hose into the bung. We can thus use gravity to transfer water from a rain barrel into the drum. This allows us to store some of the rainwater we collect for later use. To get the water out of the basement drums, we got this hand pump, to which Mike attached enough PVC pipe to the inlet end to reach from an open bung hole to the bottom of the drum. He also attached PVC pipe to the outlet end so we can pump the water into a bucket or a watering can. The set-up is shown in the photo below. When the drum is emptied, we move the pump to a full drum and refill the empty drum from one of the rain barrels. We carry the water we pump out to where we need it.

When we still had a toilet with a 3.5 gallon flush, we used some of the rainwater we collected to flush the toilet. Now that we have a 1.6 gallon flush toilet I prefer not to splash blackwater out of the toilet as was inevitable when we bucket-flushed the toilet. These days the primary use for the rainwater in the basement drums is for drinking water, along with watering houseplants and started seedlings during the winter months. We filter the rainwater with this filter with four ceramic filter elements installed and drink the filtered water. We can and sometimes do use it for cooking as well. I like the taste of the filtered rainwater better than that of our municipal water, which is drawn from the Missouri, Meramec, and Mississippi Rivers and requires considerable treatment before it can be drunk. While I can’t speak specifically about health issues, I feel quite confident of the fitness of the filtered rainwater for drinking in spite of the asphalt-shingled roof (although when it next needs replacement, we’ll replace it with an enameled metal roof, the preferred choice for rainwater collection). The rain doesn’t have much contact time with the shingles and the roof was already in service for eight years before we collected water from it, so I suspect most of the volatile compounds of concern had already leached out of the shingles. The ceramic filters will filter out bacteria, which I suspect is the major concern with water collected off a roof. They will last for many years with occasional cleaning. However, I urge anyone who wants to drink collected rainwater to educate yourself thoroughly and consider your own circumstances, which may differ from mine. What I’ve said is for informational purposes only!
At any one time the barrels underneath the house downspouts can hold up to 300 gallons of water. That’s not enough stored water to carry the container plants through a several week long drought, much less the other plantings in the quarter acre of ground downhill of the barrels. The vegetable gardens are uphill of the house barrels so they cannot be watered from them except by hand-carrying water. After we got our garden shed last winter, which sits at about the same level as the vegetable garden, we set up a system to collect rainwater from the shed roof in a 500 gallon low-profile water tank which then can water the vegetable garden by gravity feed. The pictures below show the tank in back of the shed and details of how Mike hung the gutters and downspout.


The shed had an enameled metal roof as an option so we chose it over a shingled roof. Rather than attaching metal hangers to the shed and hanging the gutters from them, Mike made platforms from scrap wood, attached them to the sides of the shed, and screwed the bottom of the gutters to the platforms. We’ll have to see how long the platforms hold up to environmental conditions. Looking at the third and fourth photos you can see that the gutters on the sides of the sheds do not have end pieces attached. Instead they empty into the gutter on the rear of the shed. That gutter has a flexible downspout attached to it and to a provided opening at the top of the tank. The tank came with a leaf screen which is under the downspout opening. The tank has two openings on the side, one near the bottom and one near the top. Mike used PVC pipe to attach a hose bib to the bottom opening, as seen in the photo below. I attached a two-way hose valve to the hose bib. One side has a short length of hose on it, for measuring the level of water in the tank and for filling a watering can. I can attach garden and soaker hose to the other side for watering the vegetable garden.

The top opening on the tank is for overflow. The first of the shed photos shows the entire overflow system (the PVC piping on the right of the tank). The photo below shows in detail how the PVC pipe attaches to the overflow opening. Later this fall I plan to put in a rain garden to be fed from the overflow. The tank sits directly on level ground and I will put the rain garden slightly downhill of the tank so the overflow water leads away from the tank.

With a one inch rainfall falling onto the 120 square foot shed roof 75 gallons of rainwater can be collected. Since the tank holds 500 gallons it takes close to 7 inches of rain to fill the tank. We haven’t had that much rain since we finished the collection system around the beginning of July. Right now, including the half inch of rain we received today, the tank holds about 300 gallons of water. That’s as much as is held by all the other rain barrels put together. For the past week I’ve been watering the container plants from the tank in back of the shed, as I had emptied the rain barrels onto part of a perennial border, into the rain garden since it had not rained in a month, and onto the container plants and spring-planted trees and shrubs. The new tank has already proven its worth. I expect to use it more during the remainder of the growing season and am thinking about how to make it more useful for watering the vegetable garden next year.
With the downspout attached directly to the 500 gallon tank I am concerned about freezing of the water in the tank or in the downspout over the winter. What I expect to do is disconnect the downspout and add a piece of downspout to it sufficient to reach the ground, as well as drain the tank. When spring comes it will be a simple matter to close the hose bib, clean the leaf screen, and reattach the downspout.
In the long run, I’d like to have more water stored in tanks or ponds at vegetable-garden level, as 500 gallons won’t go far in a drought like we had last year. Also when the rain barrels at the house need to be replaced, we’d like to replace them with higher-capacity tanks or linked barrels and have more rain gardens or berms to hold overflow water. But this isn’t bad for a start.
Great article...I lived in the Caribbean islands @ ~17 degrees north...we generally had all the water we needed stored in a cistern, all caught off the roof.
ReplyDeleteThanks! Cisterns were not uncommon equipment for older houses here. Our house may have had a cistern when it was built; there is a possible entrance near an old foundation in the back yard. Mike's maternal grandparents lived in a small town about 60 miles west of here. They collected all their water off a metal roof and stored it in a cistern. I'd like to see this low-tech water catchment technology become more popular again!
Delete